
Mobile App Tutorial: Android Development with Xamarin on Windows
What is Xamarin?
First, Xamarin is a software development company created by the former developers of Mono Open Source, which was bought by Novell.
Mono open source is specialized for Microsoft's .NET Framework based on the ECMA standards for C# and the CLR (Common Language Runtime). However in 2011, Xamarin announced that Novell had granted a perpetual license for Mono, MonoTouch, and Mono for Android to Xamarin. According to the specific OS target, it is often called as well:
Xamarin.Android = Monodroid
Xamarin.iOS = Monotouch
Now, Xamarin has its own Studio which works perfectly for native mobile development across the different platforms. All of the iTexico Software Development workforce appreciates the capability to reuse the existing code for different platforms.
The platform works a little bit different if you run are developing on OS X or Windows. In this post, I test it on Windows.
Getting Started
Let's try cross-platform Xamarin Studio and visual Studio with a basic software development tutorial: Creating buttons. We'll see how can many errors could appear and how to solve them.
There are two ways to start coding a mobile app using an IDE:
1.- Using Visual Studio (Note: Any Visual Studio Express Edition is insufficient, because it does not support plug-ins)
2.- Using Xamarin Studio
Configuring the installation
We need to tell the IDE where to found the components already installed (only if we choose another folder location)
Choosing Visual Studio
Just check if the path configuration is ok:
Tools -> Options -> Xamarin -> Android Settings
Android SDK
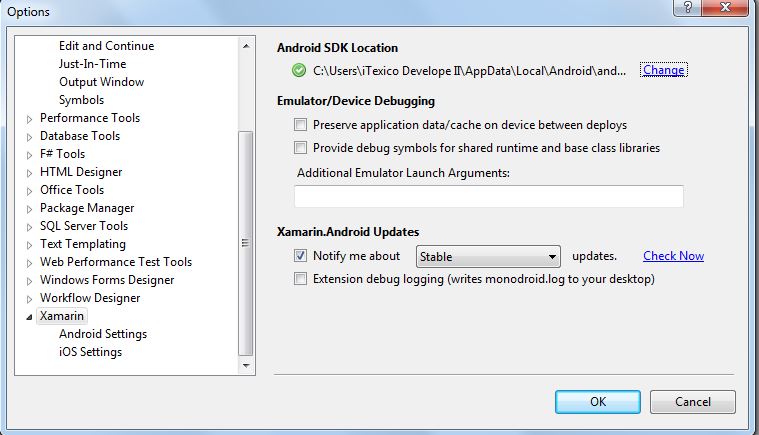
NOTE: Be sure you have a Xamarin account, if not you need to create one to use Xamarin in Visual Studio, otherwise an alert window will pop up asking for a Xamarin Business Edition or higher to continue.
Choosing Xamarin Studio
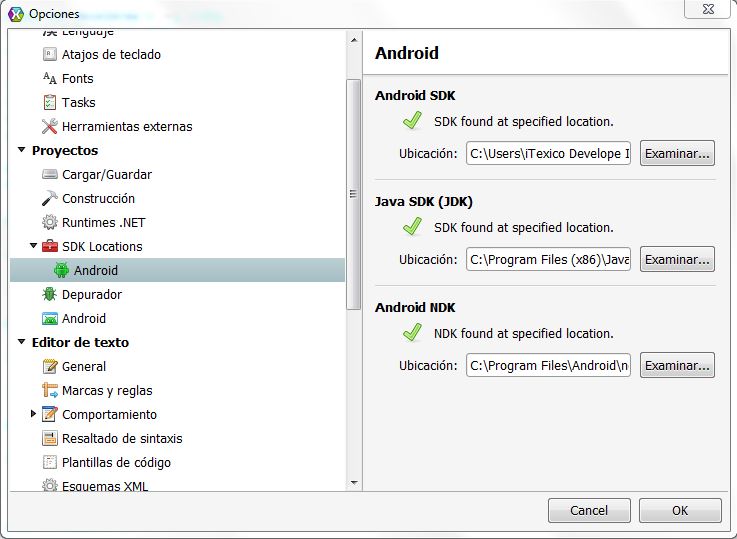
Just check if the path configuration is ok:
Tools-> Options-> SDK Locations
Android SDK / Java SDK (JDK) / Android NDK

Expand your Mobile Team
Creating a Xamarin.Android Application
For this example we will create the famous Hello World, a custom text used for software testing.
With Xamarin studio: File->New Solution
With Visual Studio: File->New Project
Practically the same, here could apply a “tomato, tomatoes”
Solution components
What's inside each folder?
|
Assets |
Contains any type of file the application needs included in its package. Files included here are accessible at runtime via the Assets class. |
|
Properties |
Contains normal .NET assembly metadata. |
|
Resources |
Contains application resources such as strings and images, as well as declarative XML user interface definitions. These resources are accessible through the generated Resource class. |
Starting the virtual device
Xamarin Studio
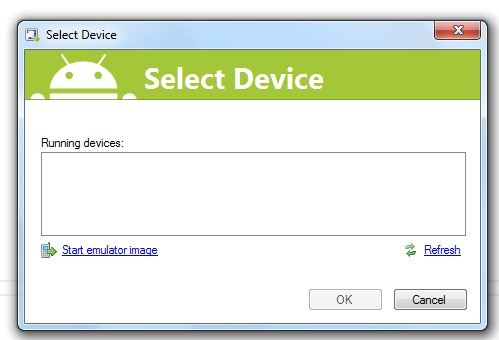
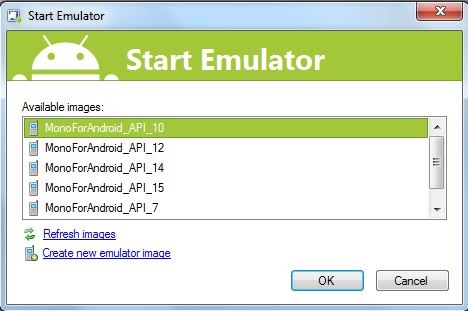
1.-Before start the Emulator
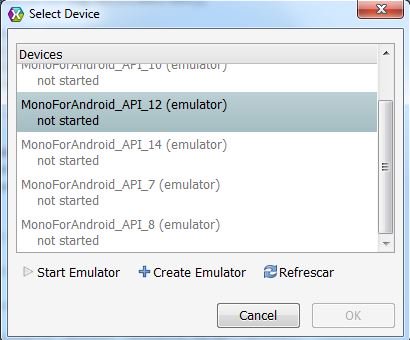
2.-After starter just choose it
Warning for Xamarin Studio: If you run your mobile app project and you see this in the error list

Take a look on the next link to see how to solve it here. After that, restart Xamarin Studio
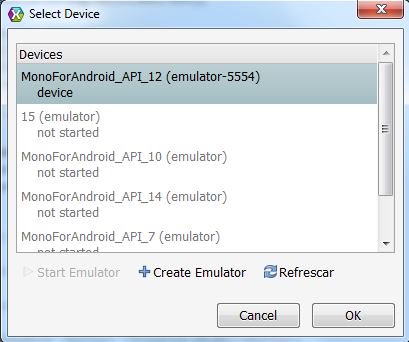
Visual Studio
Click on Debug menu and then click on "start without debugging"
1.-Before start the Emulator
2.-Choosing the emulator
3.-After the Emulator started, select OK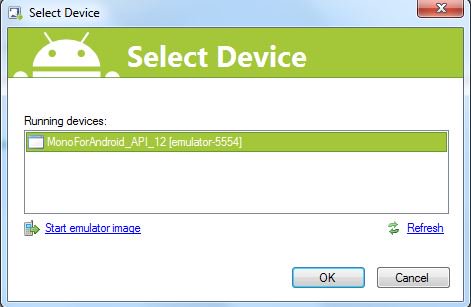
Creating the User interface with Code
protected override void OnCreate (Bundle bundle) {
base.OnCreate (bundle); //Create the user interface in code var layout = new LinearLayout (this); layout.Orientation = Orientation.Vertical; var aLabel =new TextView (this); aLabel.Text= "Hello, Xamarin.Android"; var aButton = new Button (this); aButton.Text = "Say Hello"; aButton.Click += (sender, e) => {
aLabel.Text = "Hello from the button"; }; layout.AddView (aLabel); layout.AddView (aButton); SetContentView (layout); } |
<- The first method called when the activity starts is OnCreate() <- We created a LinearLayout and set its Orientation to Vertical the LinearLayout class is used to align controls one after another <- Next, we created TextView and a Button and will be children of the layout <- When the user clicks the button, we'll change to change the text of the TextView <- With the controls created, we need to add them to the LinearLayout instance. |
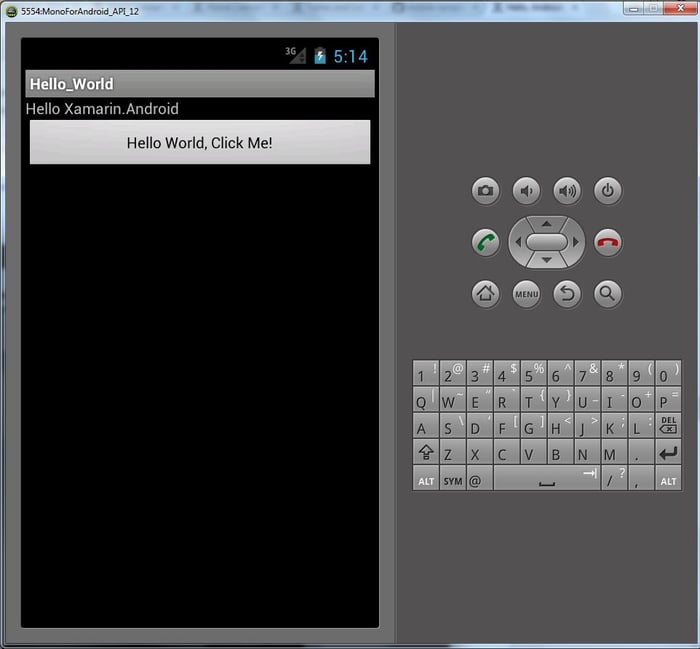
Deploying and launching the mobile app
So we have some samples of how the button should look like
So Important!
In order to learn more about Xamarin, you can clone the monodroid-samples located on github. Just open the solution NotePad-Mono.Data.Sqlite or whatever you want, but if your Resource.Designer.cs file is broken (a warning sign) the app won’t run.
Also, it is possible you see this in your error list "The name resource does not exist in the current context"
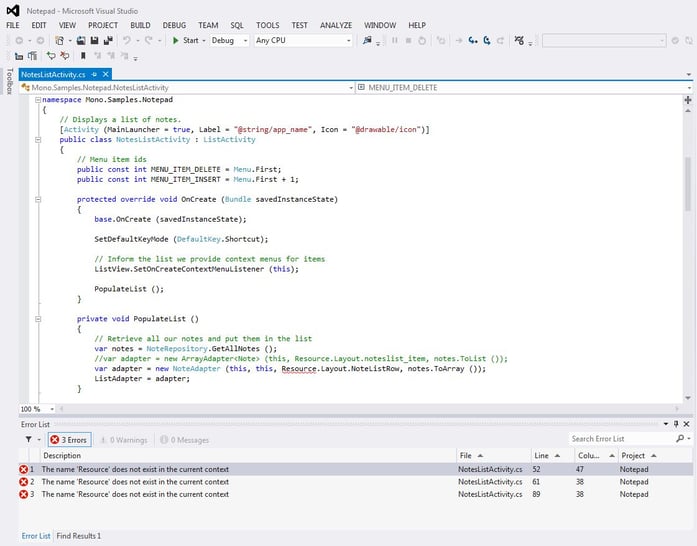
But don't worry about it here is the solution:
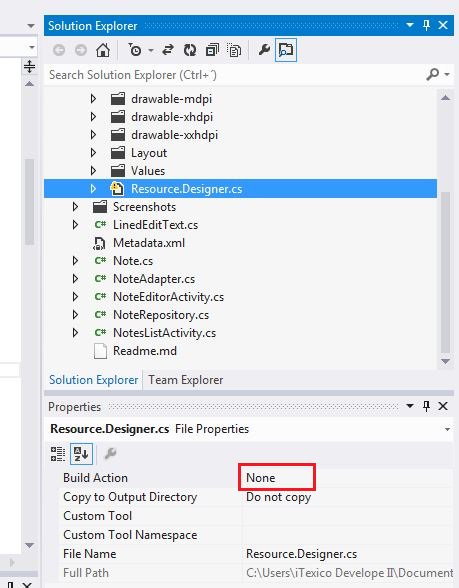
1.- Change the build action to None in the First activity that it is execute (NotesListsActivity.cs) and the Resource.Designer.cs
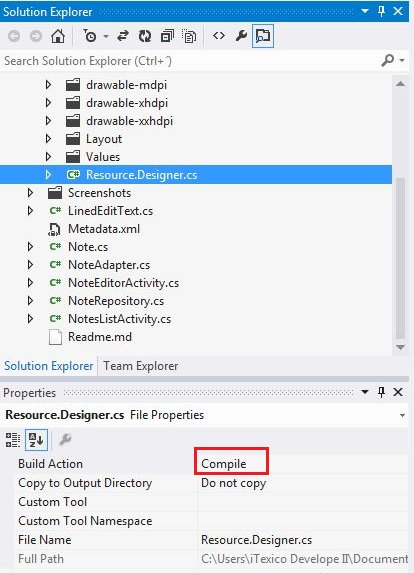
Then change the Build Action to Compile in both cases
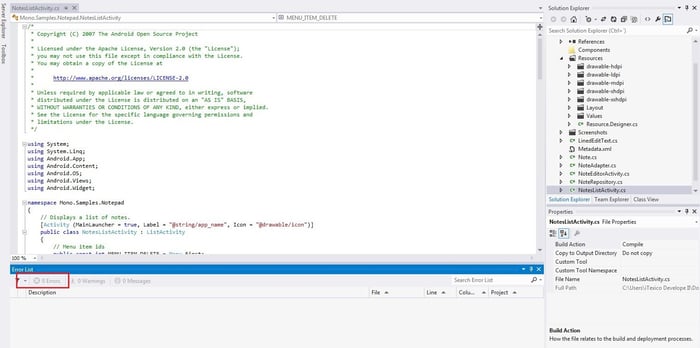
After that, go to the Build menu and then click on build solution. And the errors disappears!
Feel free to comment this post. We like to know what you think about it. If you have not hear about Xamarin yet, keep calm and know Xamarin!
Happy coding!
About the Tech-Author
Jesus Jimenez is a Computer Science Engineer at iTexico. He has been involved in Java for Web, PHP and SAAS projects, and contributing to Open Source projects. In his free time, Jesus likes to spend time into learn programming languages like Python, Ruby with Gnome and dive into frameworks like Bootstrap, and Meteor. He currently works as Xamarin Mobile Developer at iTexico.


Post Your Comment Here