
Android Wear Developer Preview
With wearable technology evolving every day, and from the first attempts of "smart" watches till smartwatches today, developers are getting more interested to be a part of this movement that we could call an extension of mobile development.
Android Wear was founded on the belief that wearable technology should be for everyone, no matter what style you wear on your wrist or what phone you have in your pocket. Since then, Google’s partnered with top watch and electronics brands to create more than 50 watches to help you manage your fitness, connect with the people who matter most, and show you the information you care about. The best part: Google’s just scratching the surface of what’s possible with wearables and there’s even more exciting work ahead.
As Google technology and partnerships have evolved, so have their users. In 2017, one out of three new Android Wear watch owners also used an iPhone. So as the watch industry gears up for another Baselworld next week, Google’s announcing a new name that better reflects their technology, vision, and most important of all—the people who wear their watches. They’re now Wear OS by Google, a wearables operating system for everyone.
Make every minute matter with Wear OS by Google. Smartwatches that keep you connected to your health, the people and info you care about, and your Google Assistant — all from your wrist.
Now the fun starts by creating a new solution with Xamarin. We will create a new Xamarin.Android project: New project > Android > App > Wear App.
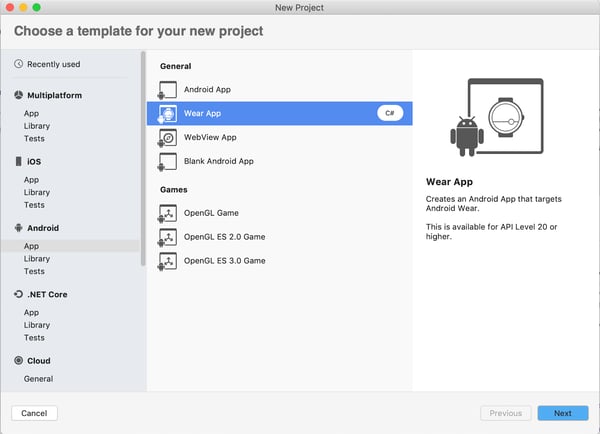
For this step, we will name the project AWDemo and the solution AWDemo.
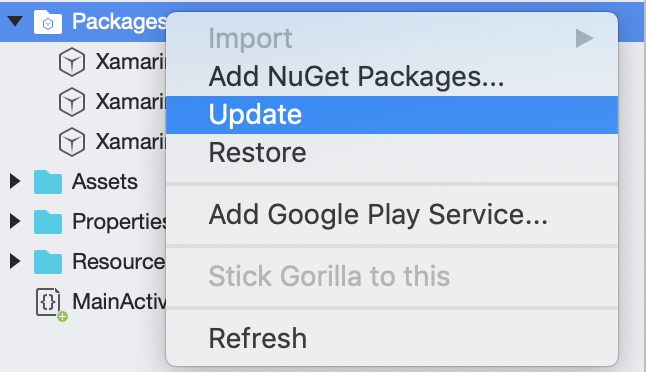
Now we will update the NuGet packages for better backward compatibility for the Android API.
Then we’re going to open our 2 AXML for Round and Rectangle smartwatches and select the specific layout device.
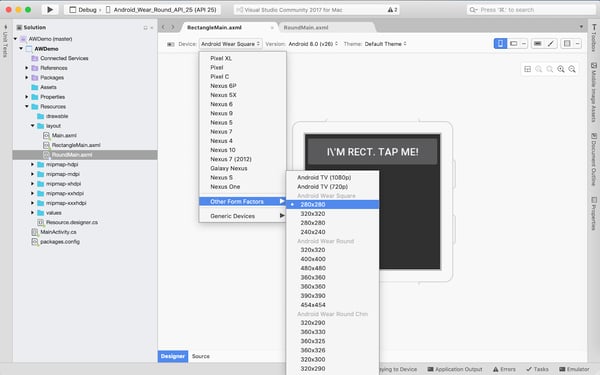
Example.- RectangleLayout
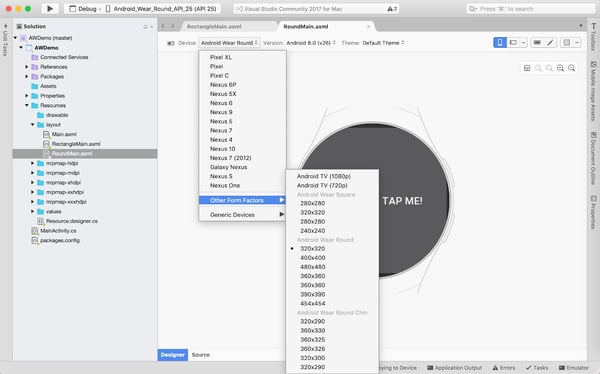
Example.- RoundLayout
Add the following image into our project.
|
Images |
 |
|
ic_bell_filled.png |
Note: I highly recommended putting images into the Drawable folder.
Then we add anim folder into our resources folder of AWDemo project and add new file with name shake_animation( Resources > add folder > anim > add file > shake_animation).
.png) |
<?xml version="1.0" encoding="utf-8"?> android:duration="100" |
We’re going to update our UI design to have more element on our app with the following code for each layout.
|
<?xml version="1.0" encoding="utf-8"?> <LinearLayout xmlns:android="http://schemas.android.com/apk/res/android" xmlns:tools="http://schemas.android.com/tools" android:orientation="horizontal" android:layout_width="match_parent" android:layout_height="match_parent" tools:context=".MainActivity" tools:deviceIds="wear_round" android:gravity="center"> <ImageView android:id="@+id/imgBell" android:layout_gravity="center" android:src="@drawable/ic_bell_filled" android:layout_width="24dp" android:layout_height="24dp" android:scaleType="centerCrop"/> <TextView android:paddingLeft="10dp" android:id="@+id/txtCount" android:layout_gravity="center" android:layout_width="wrap_content" android:layout_height="wrap_content" android:text="@string/hello_round" /> </LinearLayout> |
<?xml version="1.0" encoding="utf-8"?> <LinearLayout xmlns:android="http://schemas.android.com/apk/res/android" xmlns:tools="http://schemas.android.com/tools" android:orientation="horizontal" android:layout_width="match_parent" android:layout_height="match_parent" tools:context=".MainActivity" tools:deviceIds="wear_round" android:gravity="center"> <ImageView android:id="@+id/imgBell" android:layout_gravity="center" android:src="@drawable/ic_bell_filled" android:layout_width="24dp" android:layout_height="24dp" android:scaleType="centerCrop"/> <TextView android:paddingLeft="10dp" android:id="@+id/txtCount" android:layout_gravity="center" android:layout_width="wrap_content" android:layout_height="wrap_content" android:text="@string/hello_rect"/> </LinearLayout> |
|
RoundMain.axml |
RectangleMain.axml |
The next step is to update our MainActivity class, we’re going to separete our code in 3 section, the first one is for our OnCreate method with the following code:
|
protected override void OnCreate(Bundle savedInstanceState) { base.OnCreate(savedInstanceState); SetContentView(Resource.Layout.Main); var v = FindViewById<WatchViewStub>(Resource.Id.watch_view_stub); v.LayoutInflated += delegate { var txtCount = FindViewById<TextView>(Resource.Id.txtCount); txtCount.Click += TxtCount_Click; }; } |
The second one is for our events:
|
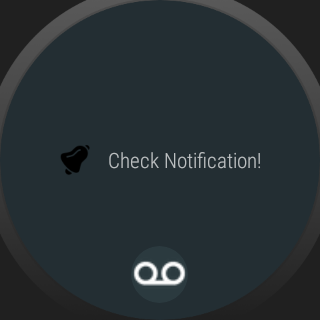
void TxtCount_Click(object sender, EventArgs e) { (sender as TextView).Text = "Check Notification!"; CreateNotification(); AnimateBell(); } |
An the last one is for our private method:
|
public void CreateNotification() { var notification = new NotificationCompat.Builder(this, "AWDEmo") .SetContentTitle("Our Wear App") .SetContentText($"Button tapped {count++} times!") .SetSmallIcon(Android.Resource.Drawable.StatNotifyVoicemail) .SetGroup("group_key_demo").Build(); var manager = (NotificationManager)GetSystemService(NotificationService); if (Build.VERSION.SdkInt >= BuildVersionCodes.O) manager.CreateNotificationChannel(new NotificationChannel("AWDEmo", "AWDEmo", NotificationImportance.Default)); manager.Notify(1, notification); } |
|
public void AnimateBell() { Animation shake = AnimationUtils.LoadAnimation(this, Resource.Animation.shake_animation); ImageView imgBell = FindViewById<ImageView>(Resource.Id.imgBell); imgBell.Animation = shake; } |
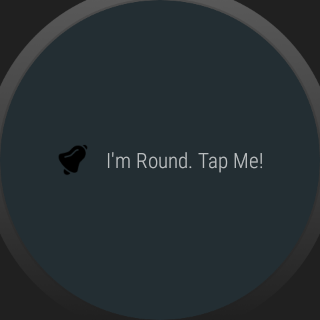
We will save our project and it is show time!
The final step is to run our app in an Android Wear emulator.
-1.png)
About the Author
José Emmanuel Díaz Mayorga is a Computer Electronics Engineer with 2+ years of experience in Xamarin Development. He's creating Android and iOS apps here at iTexico.


Post Your Comment Here