
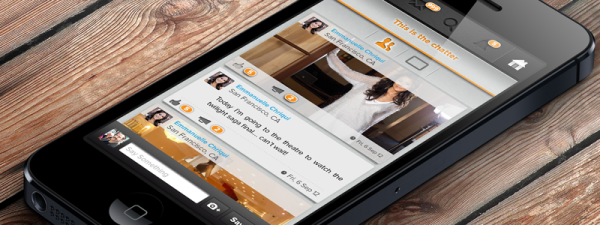
Good UI Design
A planning methodology is a must best-practice in mobile UI design. As a UX/UI designer, down the read you’ll realize that the time between the first mock-up until the final delivery may seem like an eternity in some projects, specially when working with those who start from scratch (particularly start-ups).
In iTexico we have implement a tailored methodology for all UX/UI projects, which is focused precisely on implementing 7 phases (or steps) of planning and delivering of a kit of design assets to developers so they can implement those in coding... and make the magic happen!
Phase 1. Pre-Analysis.
Before designing, it’s important to know as much as you can about the purpose of the application and which focus is needed to resolve the issue at hand. The first thing you should do is search about similar products already in the market and get to know their virtues and weaknesses. Find what they are lacking, the compare them with the product you’re creating. This will provide you with an adequate and effective interaction design as well as some good ideas on how to approach textures and other graphics. Do not take more time that needed and be objective with your analysis.
Phase 2. Planning the interaction flow.
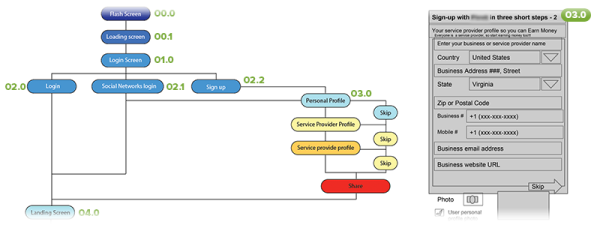
You can map out an interaction diagram including all the system’s modules and how the interconnect with each other. This will show you the bigger picture of the whole system and how it will work. After this step the immediate thing to do is elaborate a somewhat abstract set of wireframes of each main screen of each module. At the end link every screen with their respective preceding and succeeding elements in the flow.
First Revision! Create a document and present it to the stakeholders. Make the necessary changes and then move forward.
Phase 3. Mockups.
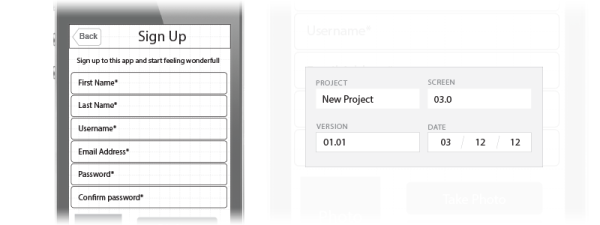
Create mockups with simple, basic graphics so they’ll be easy to move around. In this phase, feel free to explore different layouts and arrangements for elements. Do not use color yet! Just use outlines and easily identifiable characteristics for each element as you try out different things.
Second Revision! Create a document and present it to stakeholders. Make the necessary changes and move forward.
Phase 4. Standardizing elements.
Make a list of all elements that you’re using in your mockups. They can be title bars, menus, pop-up windows, icons, buttons, alerts, photos and so on. Standardize those elements as much as possible so you can clone them throughout the application and there won’t be slightly (or sometimes not so slightly) different elements for the same purpose. Create a style-guide of fonts and sizes, the less the better! By doing this you’ll save some time in the design work and a lot of time in the coding work! Once finished with this, work out the details in your mockups and don’t be afraid to experiment with colour palettes to define a final colour scheme.
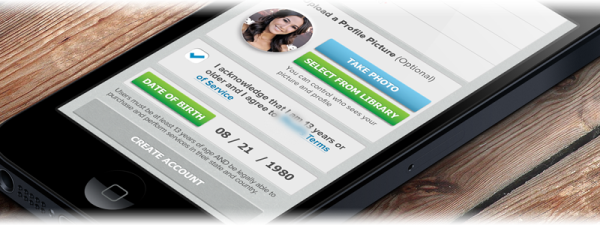
Phase 5. Dummy.
Create a dummy version of your app and include screen and element interactions. There are some tools that make the tracking of interactions a bit easier, such as Invision (available for free). Some other alternatives include Adobe Flash or Fireworks (or feel free to come up with your own tailored solution). Plan what kind of animations and transitions will exist during navigation, if there is no easy way represent them in the dummy don’t forget to include notes.
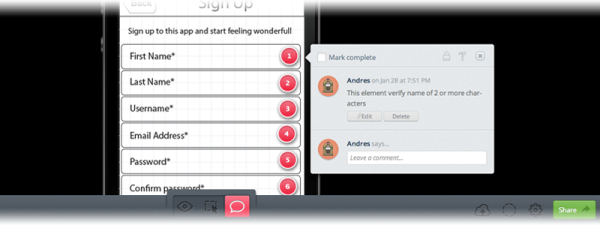
Third Revision! Present the dummy to test users and get as much feedback from them as you can. Make the necessary changes and move forward.
Phase 6. Final Mobile UI Design Style Guide.
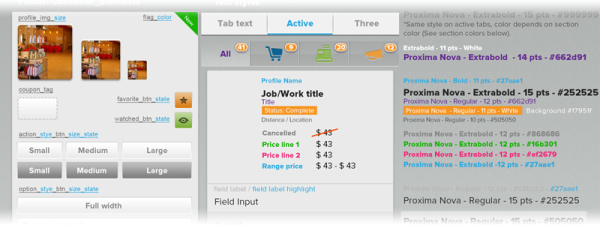
According to your list of elements and typography, create a .psd file with the final “views” and states of each of the elements. Include colours, states like pressed and released buttons, textures and so on. Some preliminary screens can be elaborated if needed during this stage. A great advantage of creating a style guide is being able to avoid the need to design all screens within the app, therefore reducing the workload of the design team. The style guide will serve as a very useful tool for developers to implement your design when coding the app’s interface.
Fourth Revision! Present the style guide to the stakeholders and if the client asks for more screens to be designed, insist in only presenting the absolutely vital ones as examples as they will be able to track the screens when the developers start implementing them on code. Make the necessary changes and move forward.
Phase 7. Creating the assets and slicing.

Make a folder for each element and name them accordingly, then proceed to slice each layer or group of layers from the Style Guide in Photoshop (or your design software of choice) and save them in the correct folder as a .png file with transparency. The purpose of this is to reuse the same graphics as often as we can throughout the app.
Delivering the Graphic Kit.
Create a kit with all the documentation and files you created during the whole process and get them ready for delivering to the development team. The flow, dummy and mockups will be of great use to developers when implementing the user interface as they can now understand what the designers have created and how to make it a reality.
That’s it! Don’t forget that some of these phases work better for some designers than other. We’ve found this to be the most suitable process for our agile mobile development team and it noticeably increases the efficiency of the UXUI mobile design.
Do you use a different process than ours? Feel free to share your thoughts in the comment section!
About the author.
Andres Reaza is a UXUI Design Expert. He holds a bachelor in Graphic Design and diploma in Interaction Design from a university in Washington. Andres has extensive experience in large mobile and web design projects as well as being a founding a startup for the restaurant industry.

Post Your Comment Here