
How to Create a Database Mobile App with SQLite and Visual Studio
When we work on mobile app development, it is just a matter of time when we face the need for data storage; information that can be the backbone for the mobile app to just a single data such as the score for a game.
Nowdays every mobile app with minimum data storage needs to use a database. Since the mobile devices do not offer the same memory and processing capacity as a computer, we need to use specially designed systems for those environments.

So I will guide you in this basic tutorial on how to create a database for your mobile app working with the cross-platform Visual studio, which is a great tool for this example.
What is SQLite?
SQLite is a database engine, compatible with ACID. Unlike client-server systems, SQLite is linked to the mobile app by becoming part of it. Every operation is performed within the mobile app through calls and methods provided by the SQLite library which is written in C and has a relatively smaller size.
Creating a SQLite database app
Create a new Android mobile application solution in Visual Studio
If you don't have Visual Studio, don't worry. You can download it here: Visual Studio
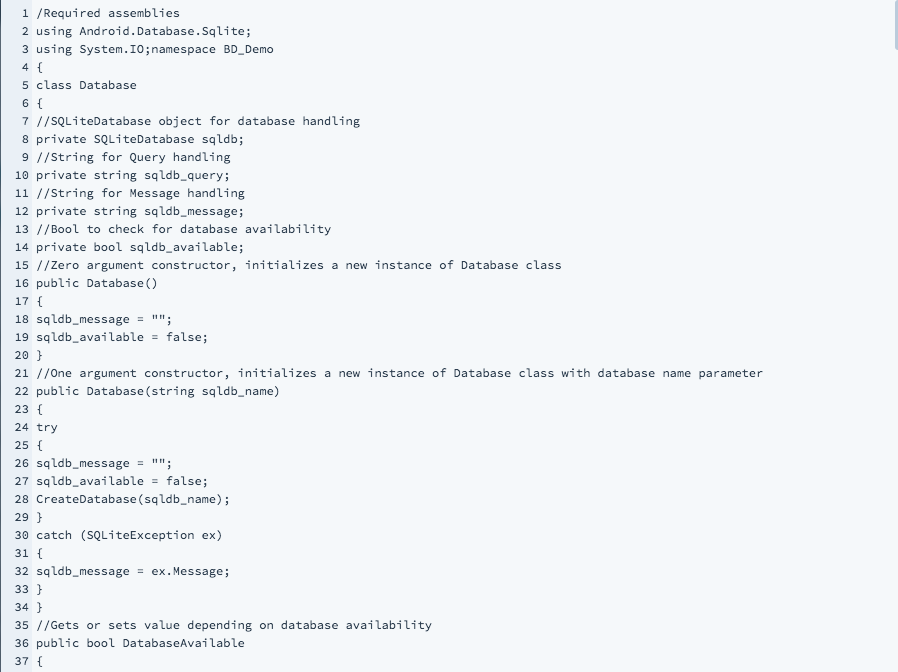
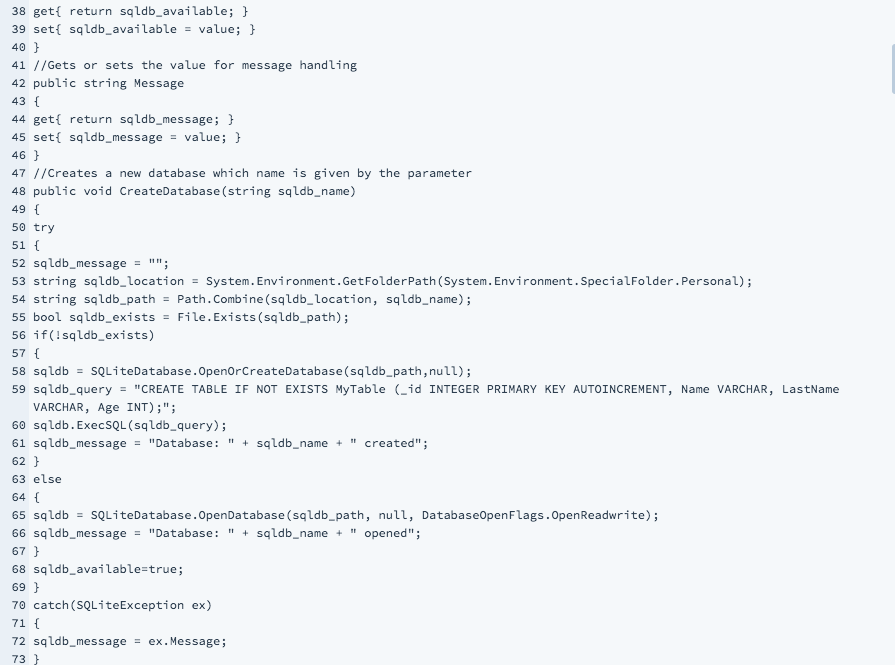
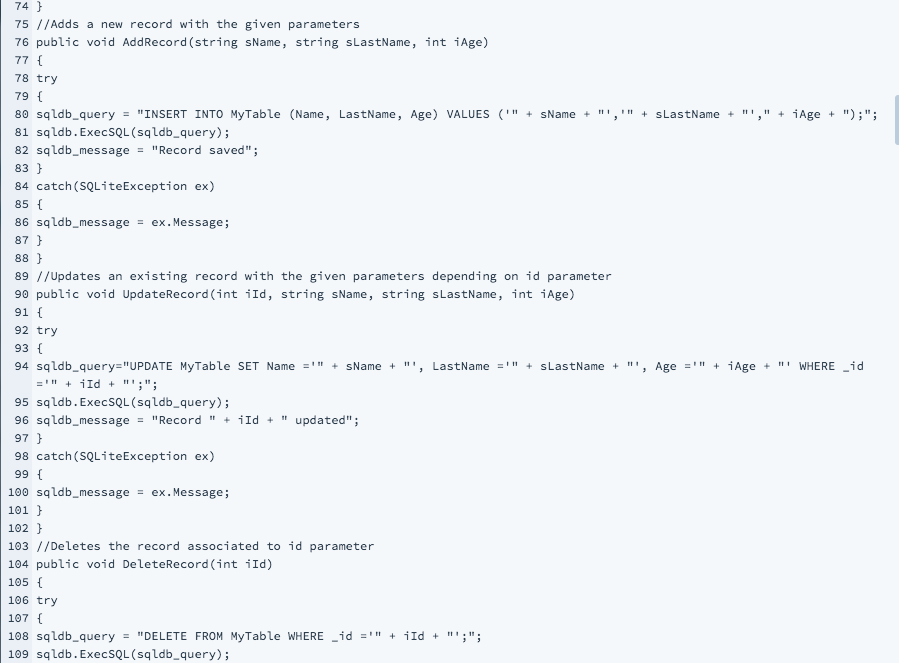
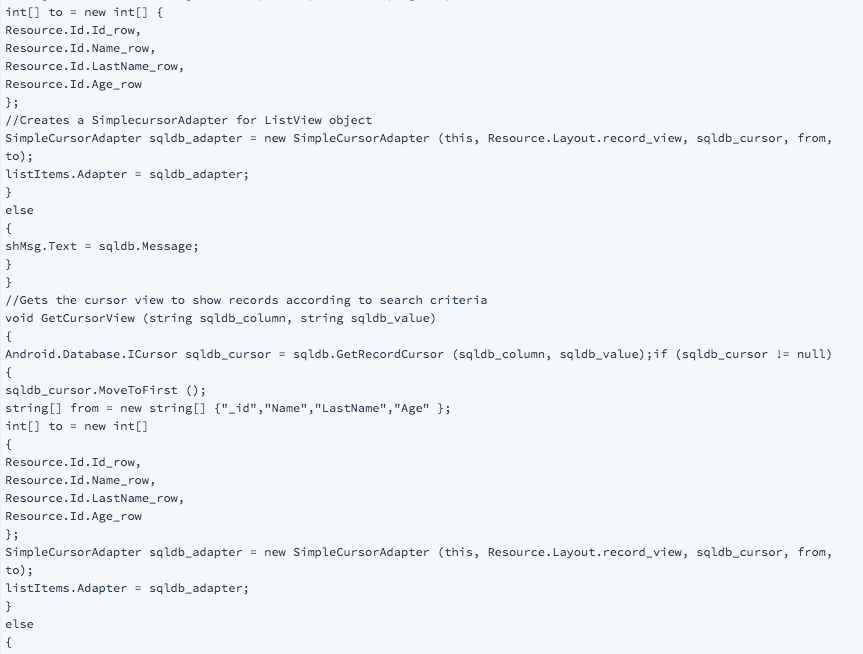
Database class
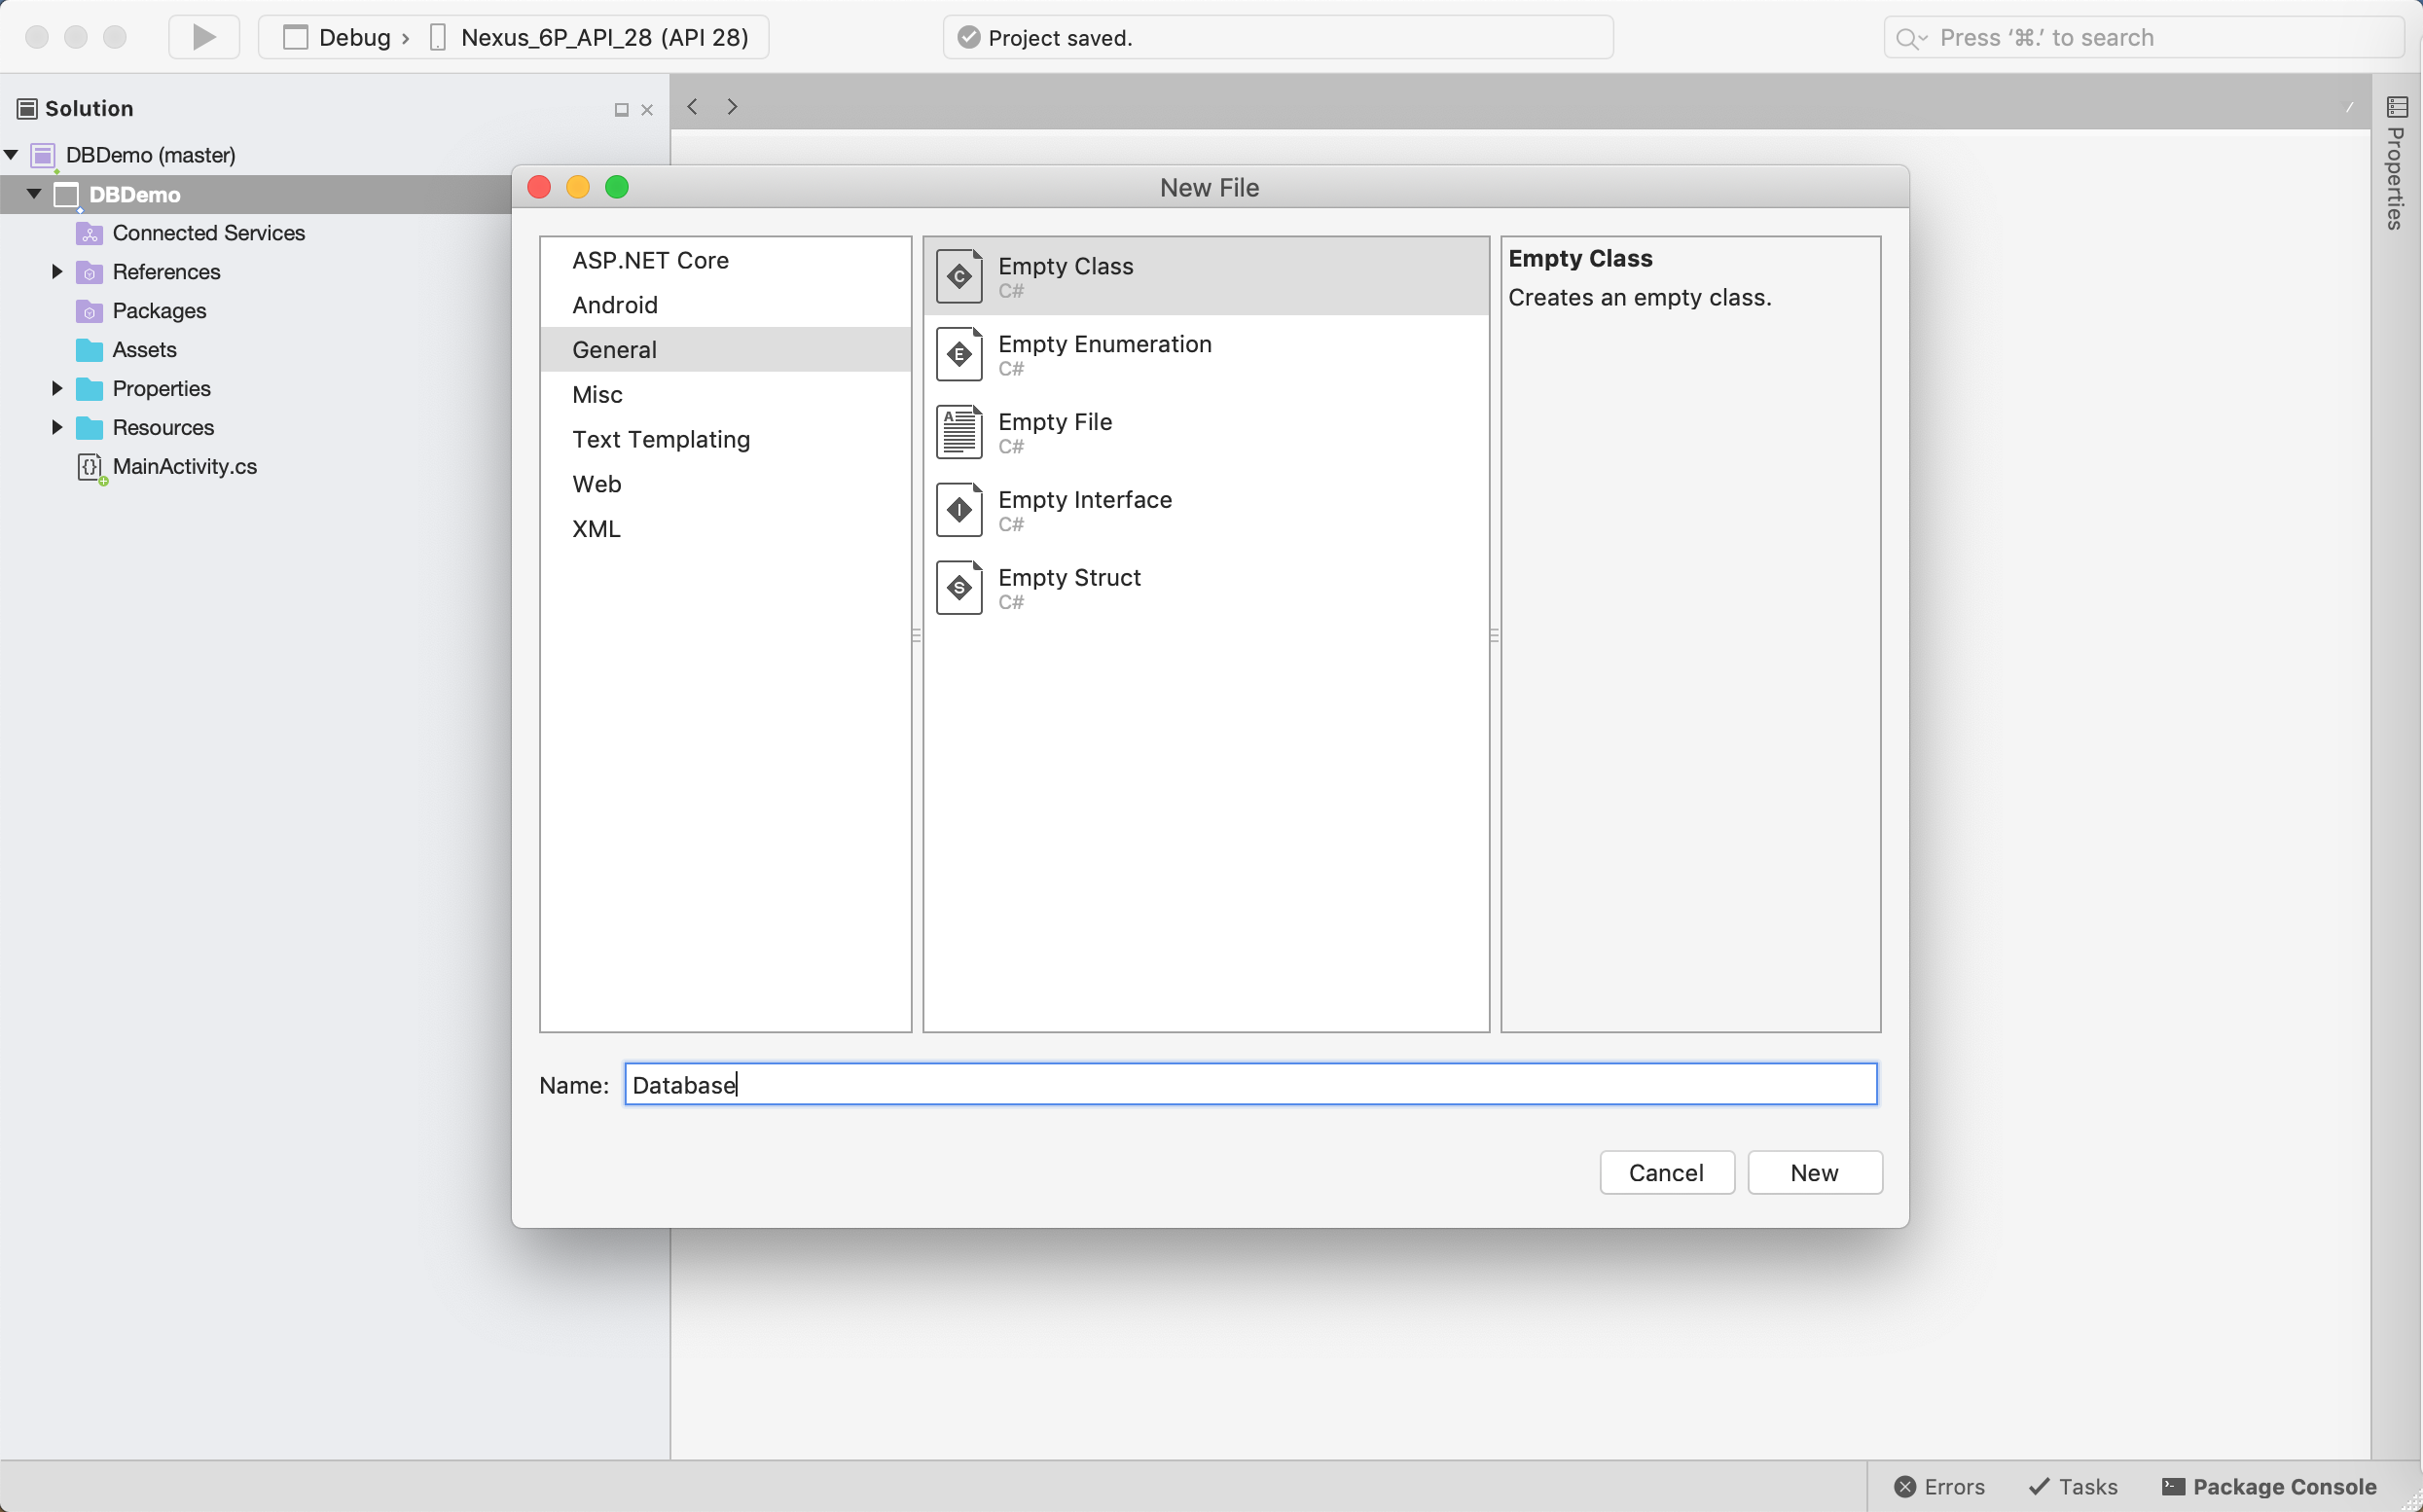
1. Right click project BD_Demo --> Add --> New File… --> Android Class (Database)
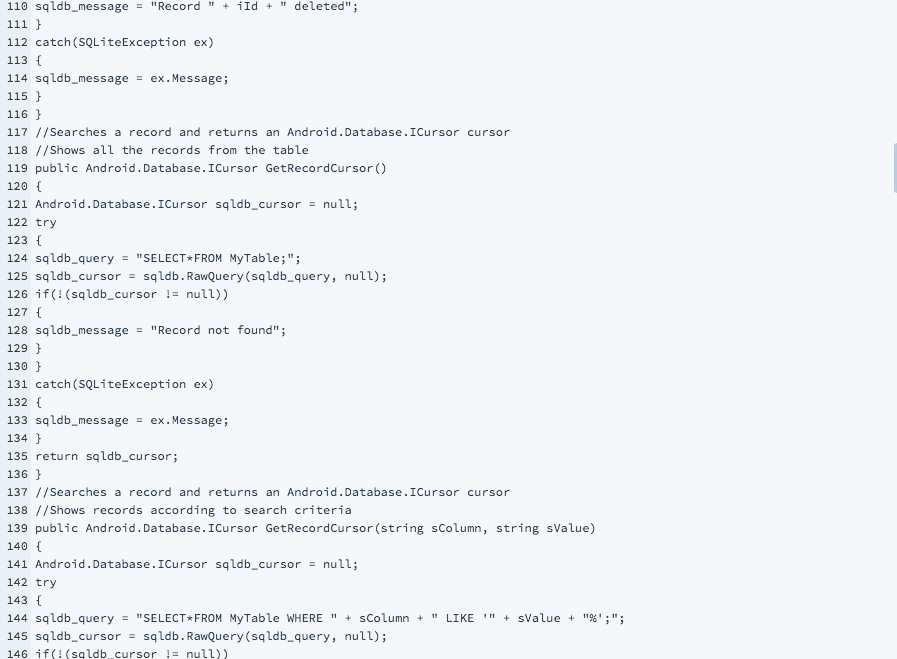
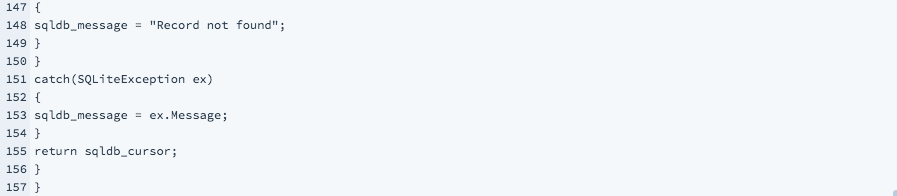
Database class is for handling SQLiteDatabase object. We are now going to create objects and methods for handling CRUD (Create, Read, Update and Delete) operations in a database table. Here is the code:
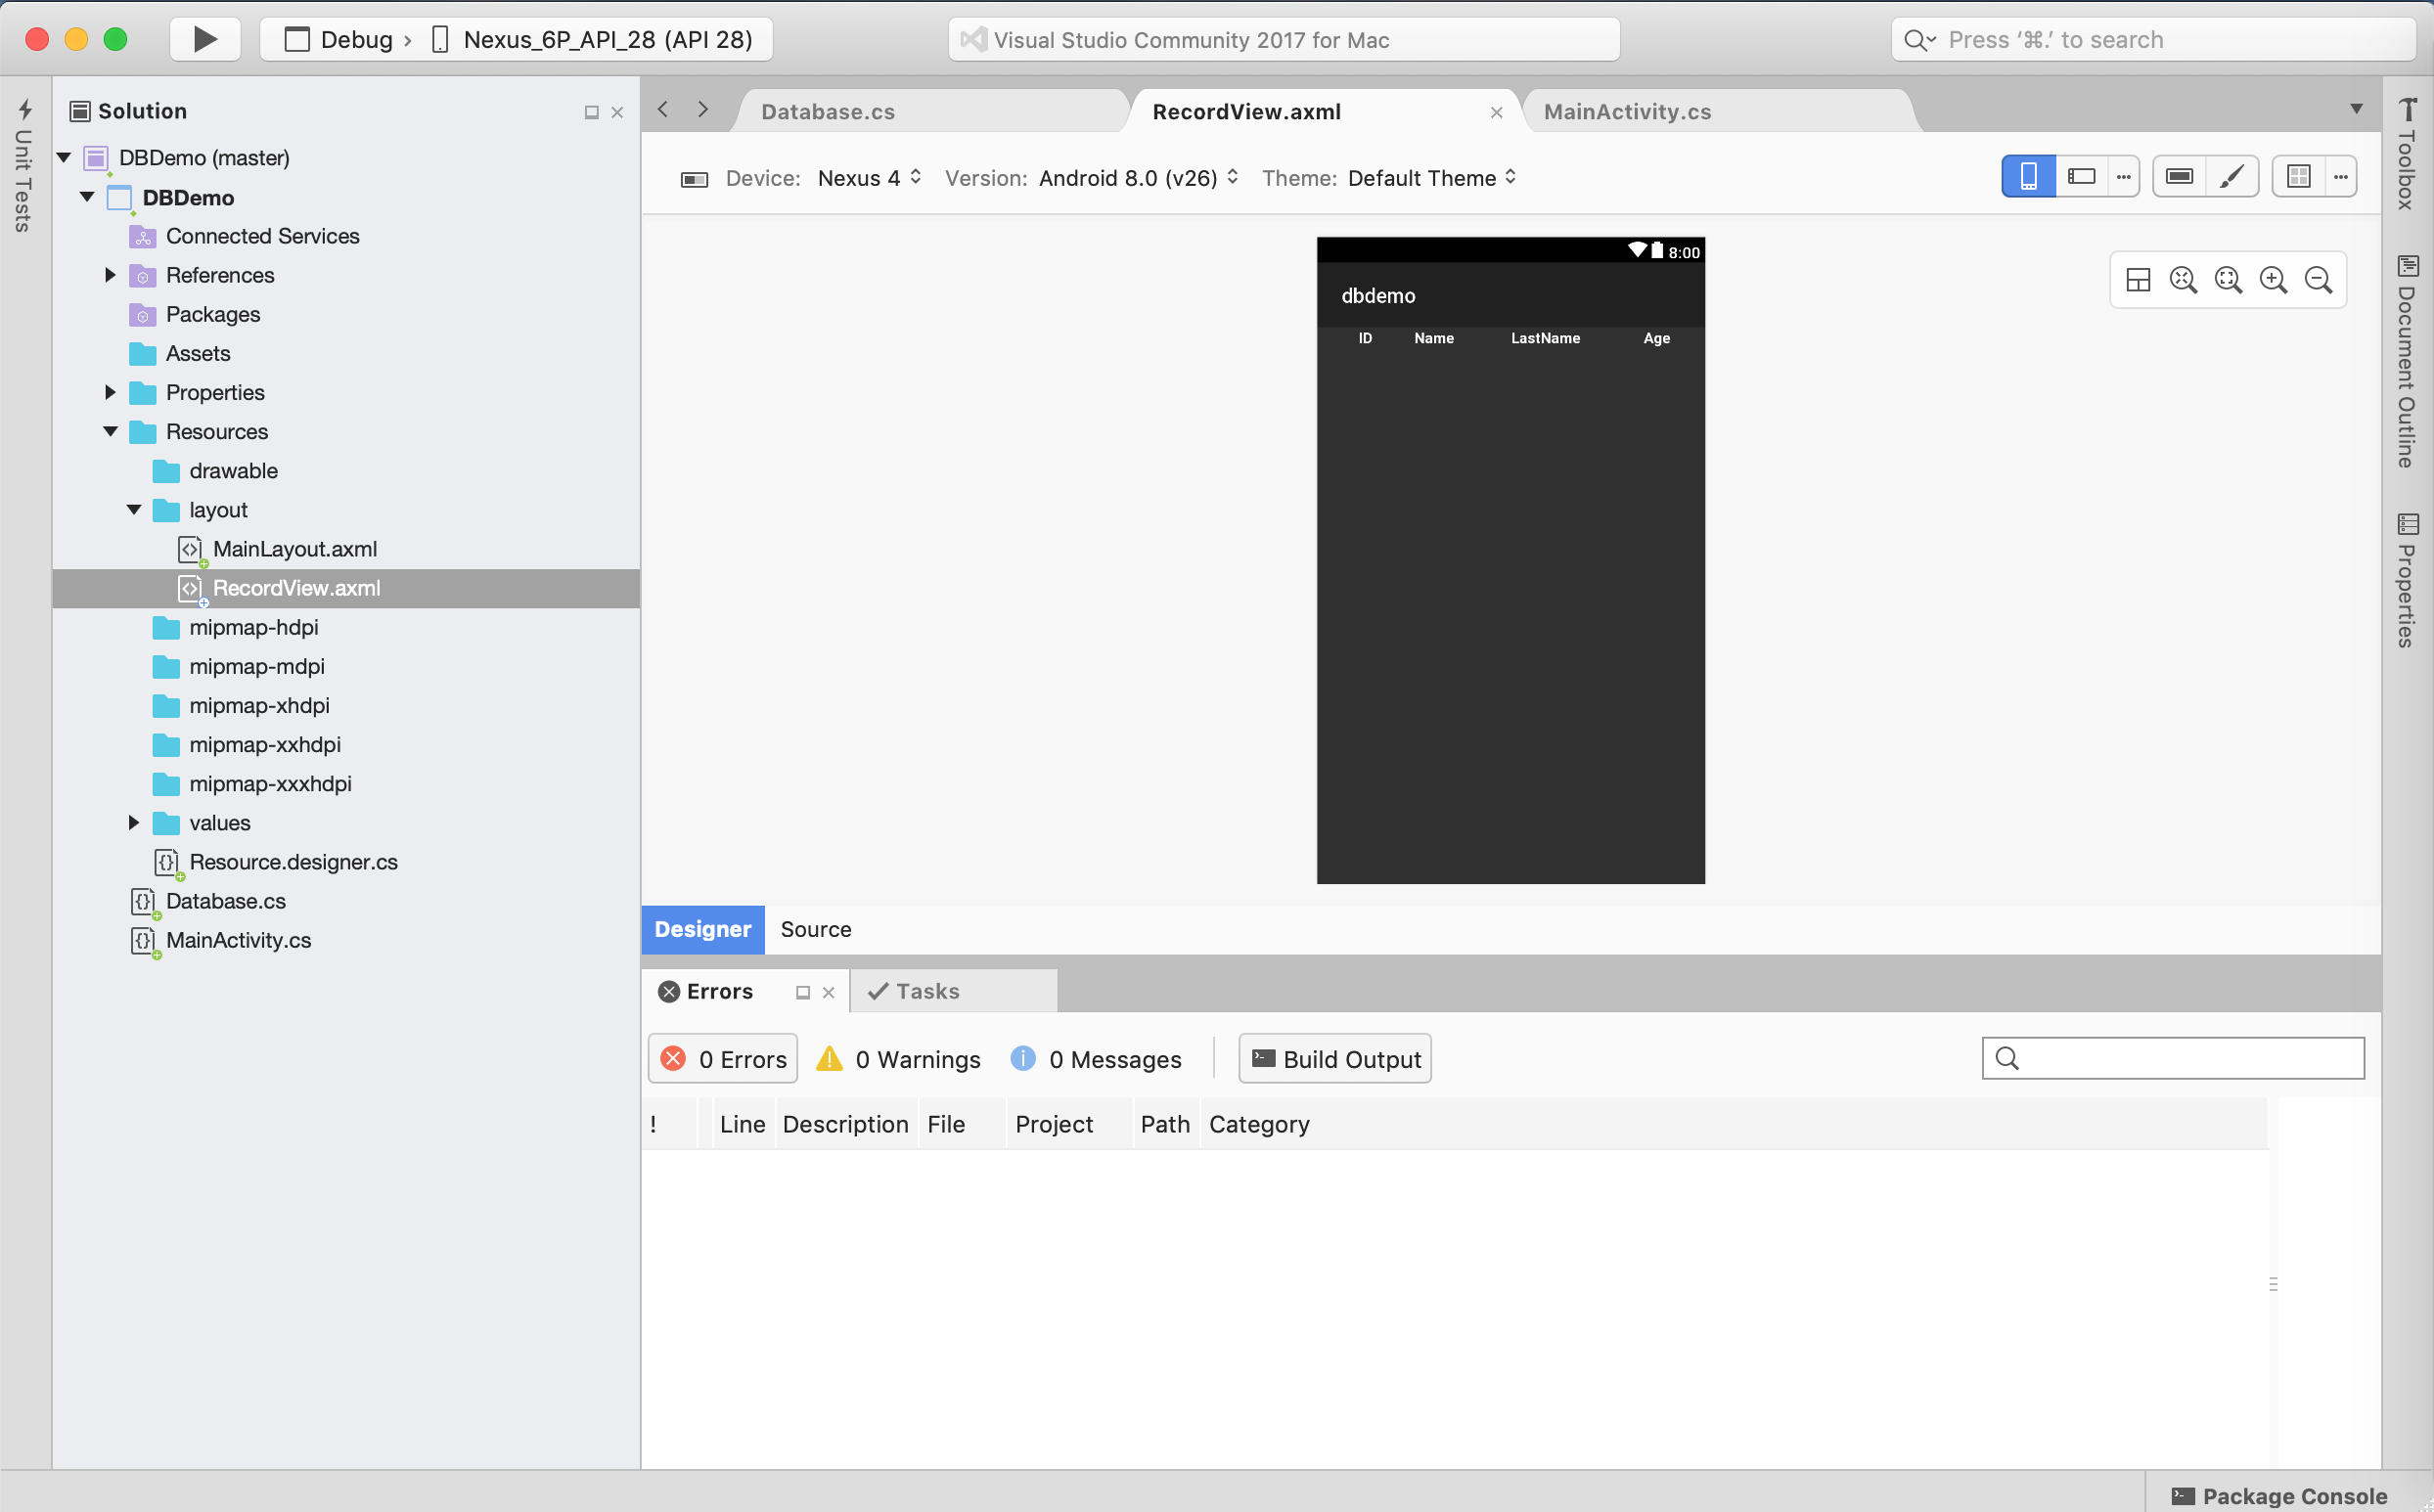
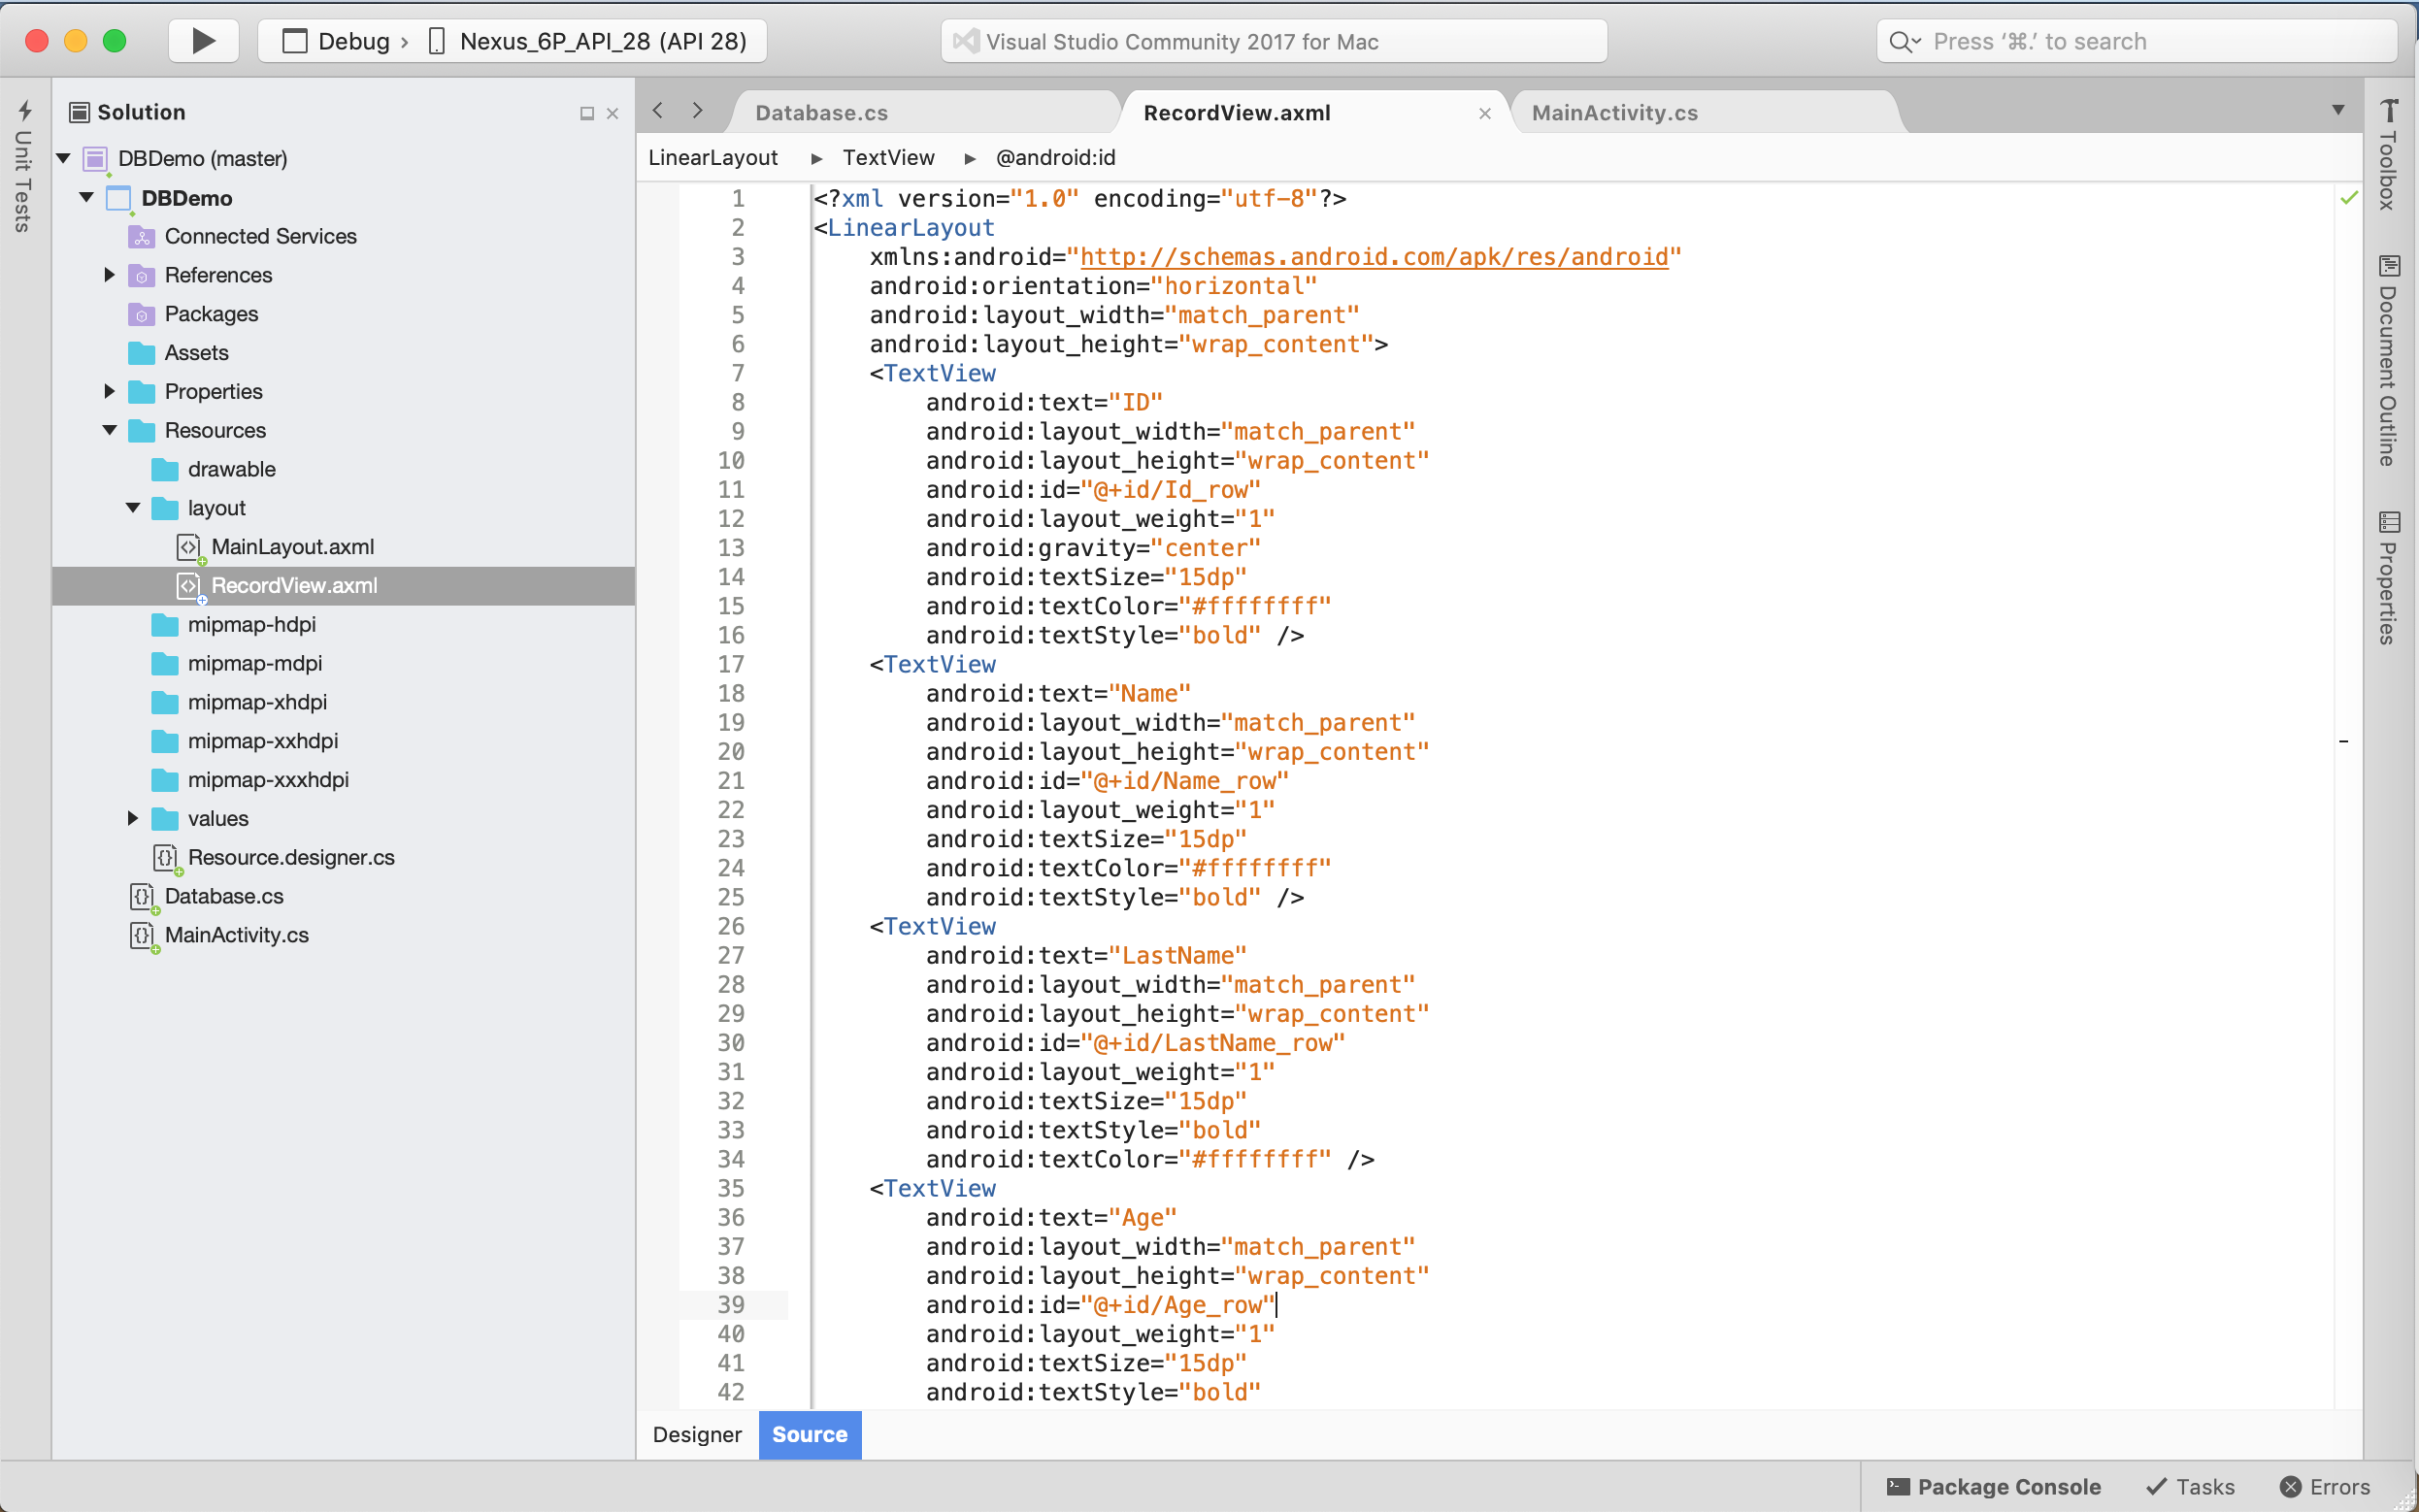
2. Expand Resources Folder on Solution PadRecords Layout
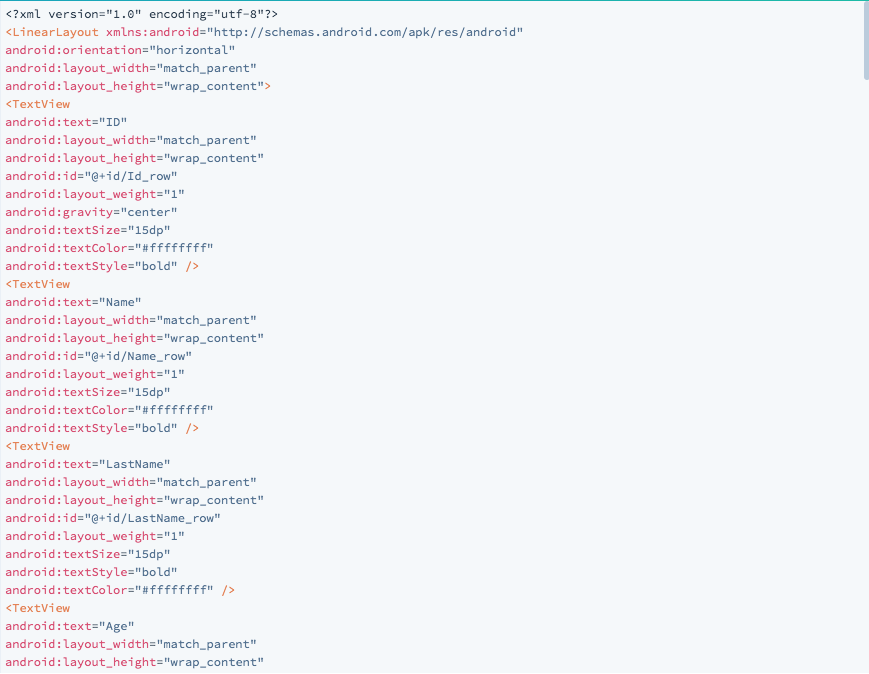
a) Right click Layout Folder --> Add --> New File… --> Android Layout (record_view)
We need a layout for each item we are going to add to our database table. We do not need to define a layout for every item and this same layout can be re-used as many times as the items we have.

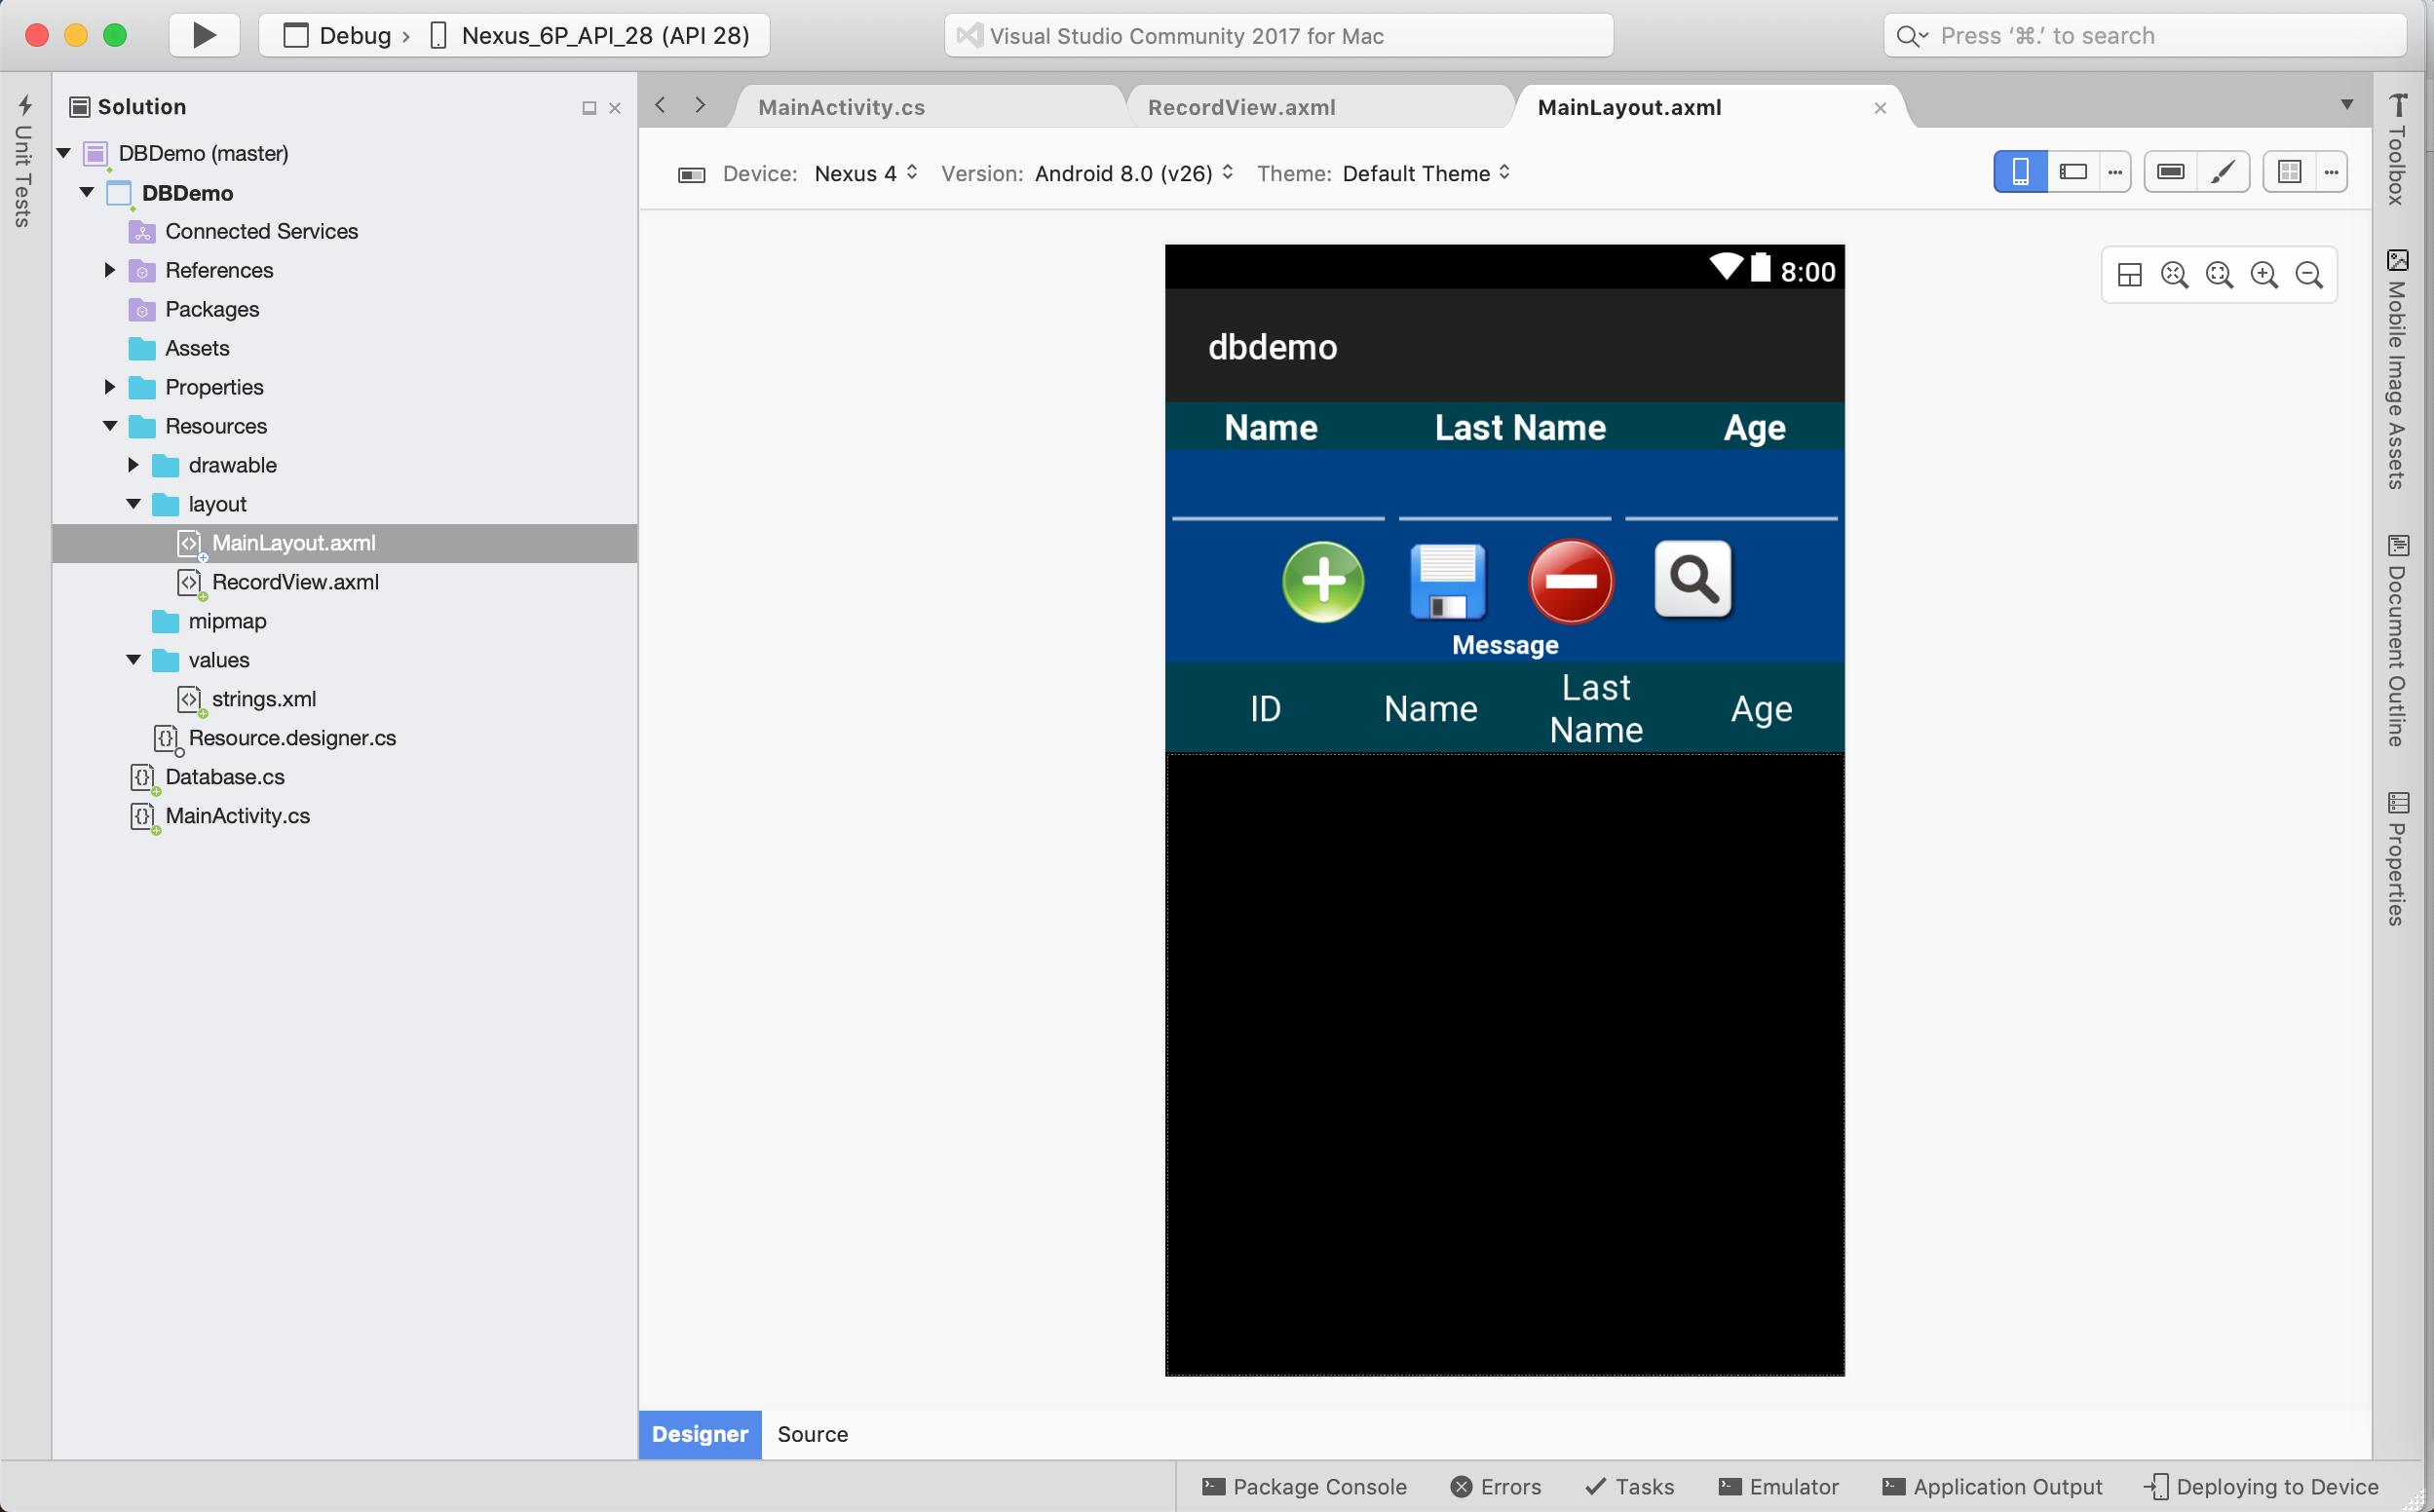
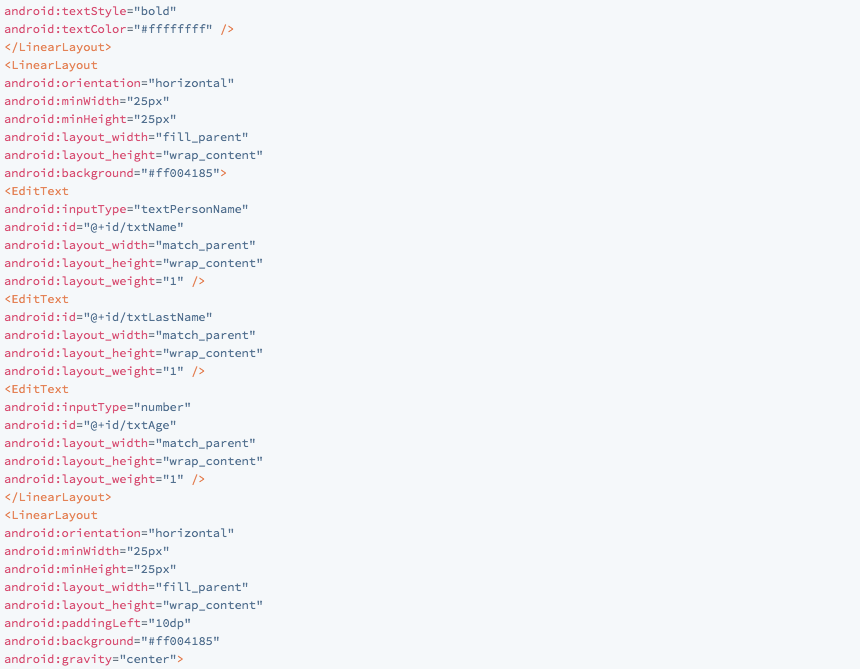
Main Layout
3. Expand Resources folder on Solution Pad --> Expand Layout folder
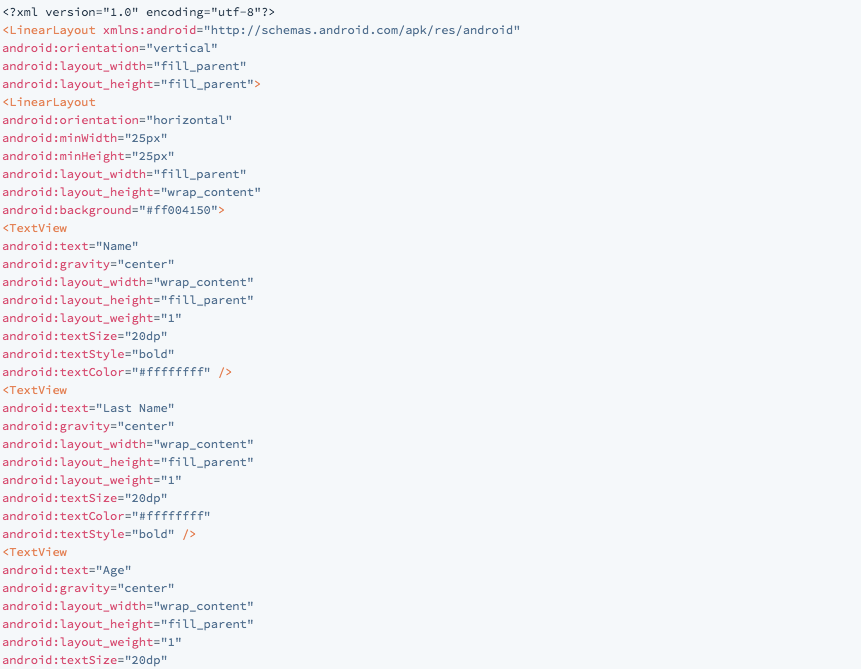
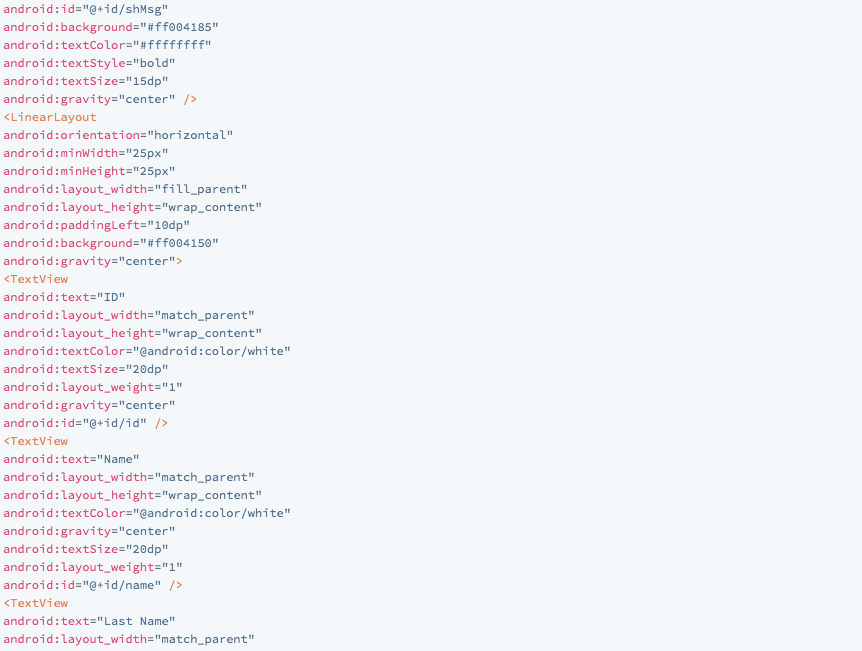
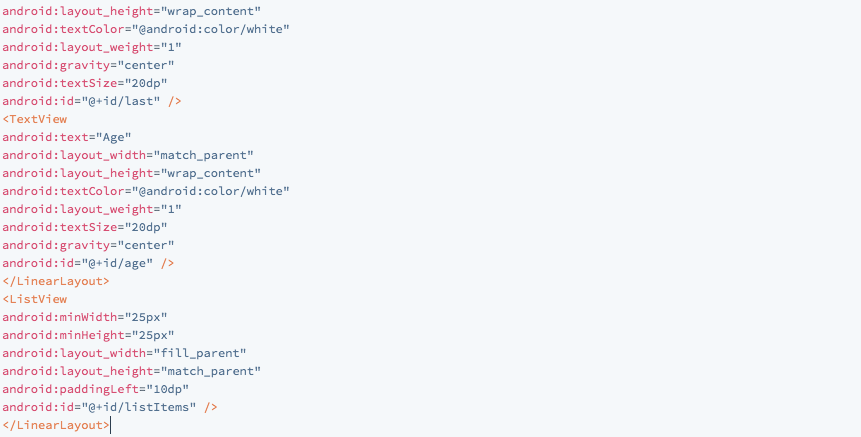
a) Double Click Main layout (Main.axml)
Xamarin automatically makes Form Widgets's IDs available by referencing Resorce.Id class.
|
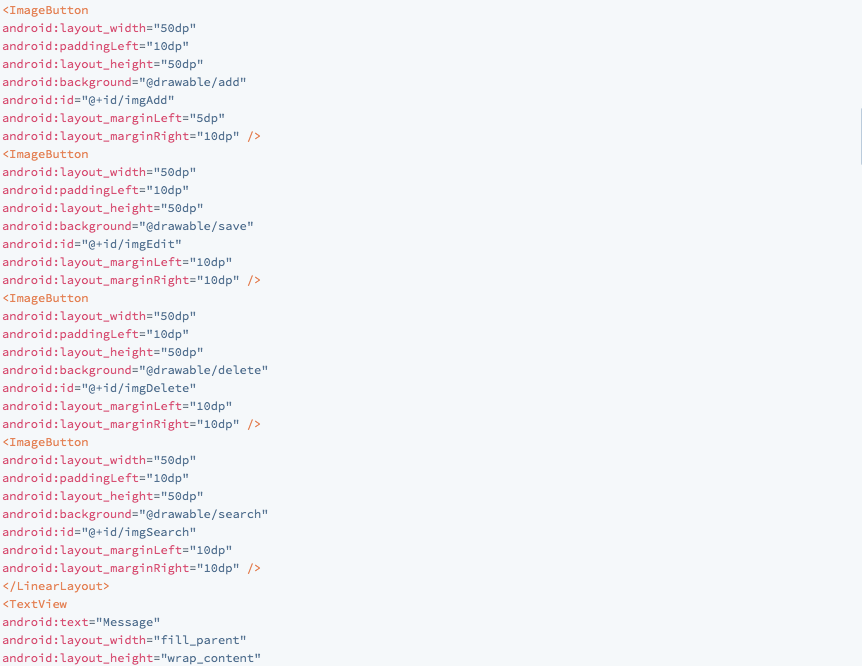
Images |
|||
 |
 |
 |
 |
|
add.png |
delete.png |
save.png |
search.png |
Note: I highly recommended putting images into Drawable folder.
-Expand Resources Folder
~Right Click Drawable folder --> Add --> Add Files…
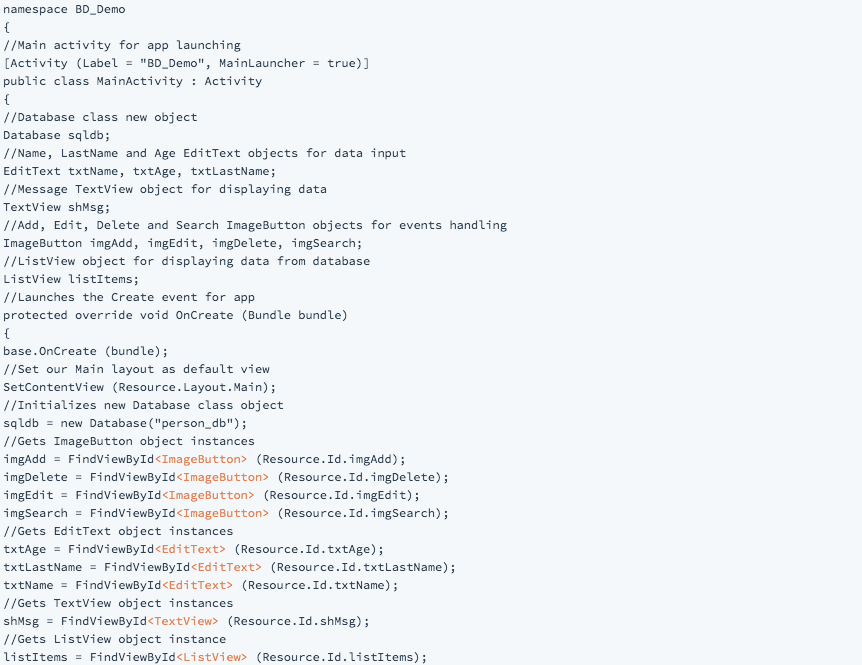
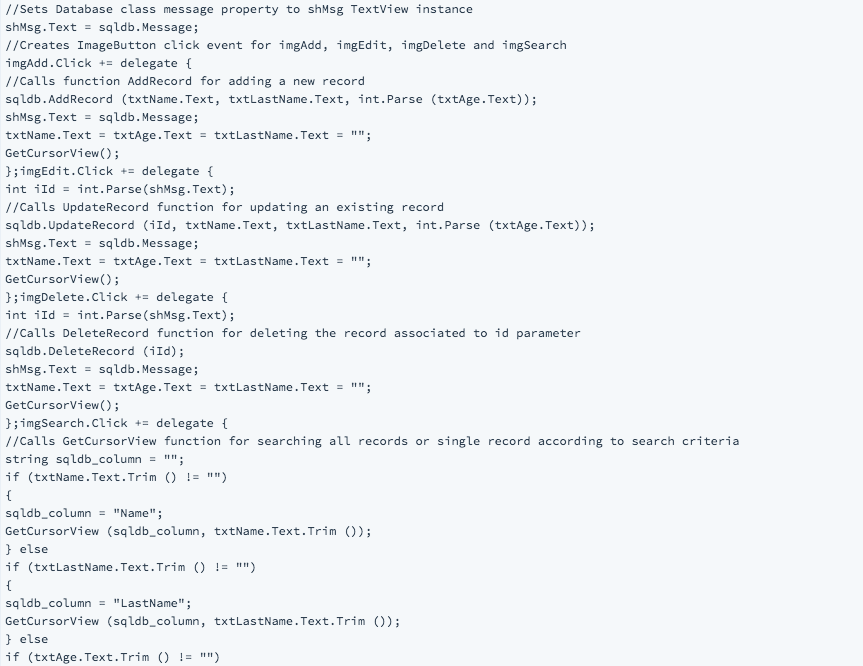
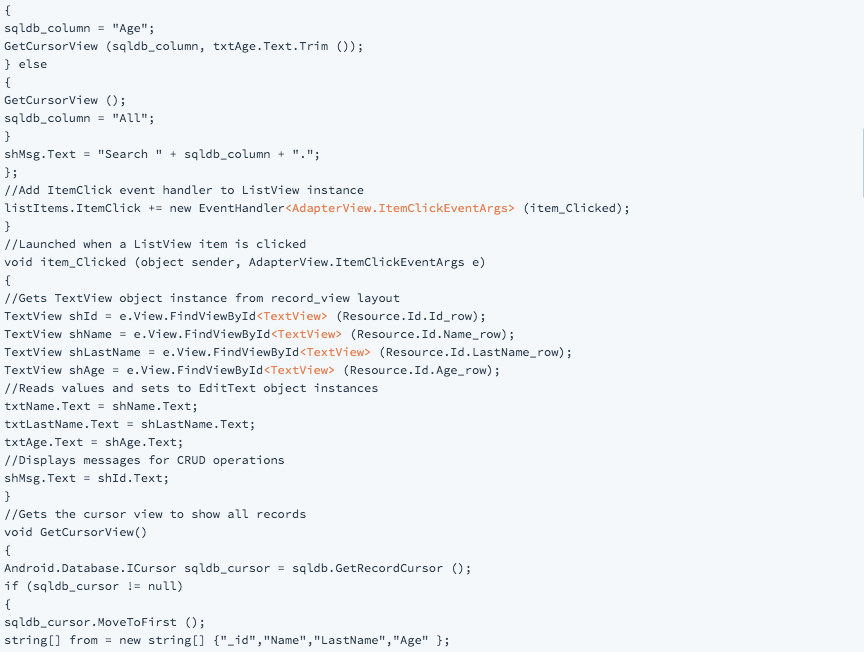
Main Activity Class
4. Double Click Main Activity (MainActivity.cs)
We have to get object instances from main layout and provide them with an event. Main events will be Add, Edit, Delete and Search for the image buttons we have defined. We have to populate our ListView object with the data stored in the database or create a new one in case it does not exist.

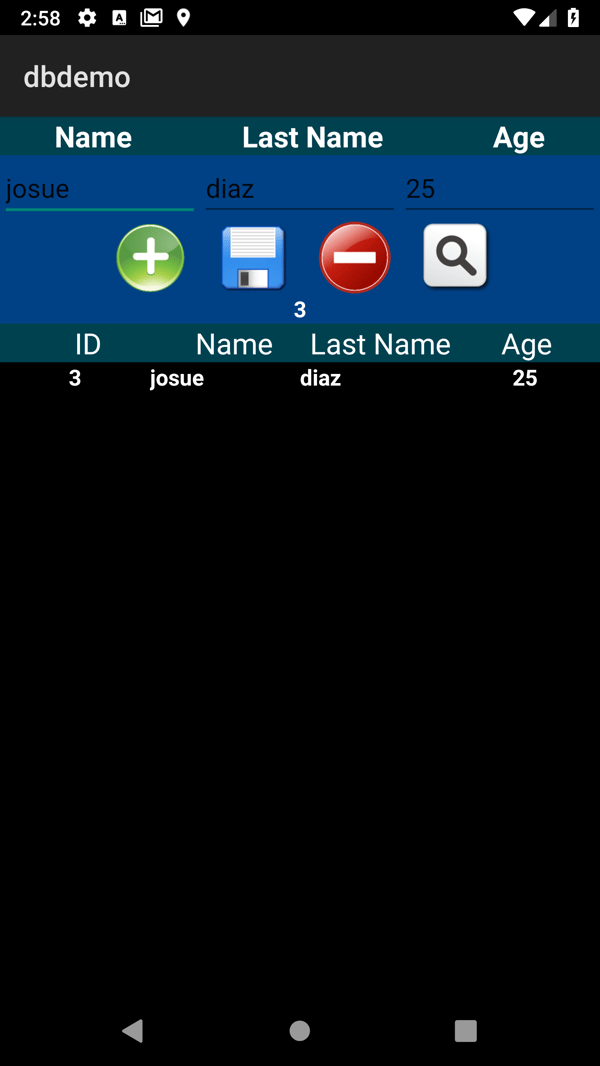
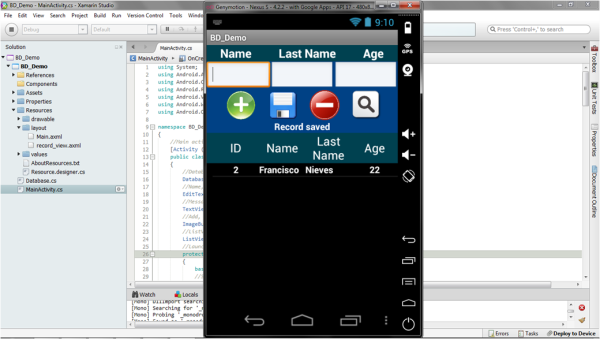 5. Build solution and run
Ok, so that's it for today! I hope that this tutorial has been useful. Feel free to make any questions, complaints, suggestions or comments.
Happy coding!
About the Tech - Author
Josue Diaz is a Computer Electronics Engineer with 2+ years of experience in Xamarin Development. He's creating Android and iOS apps here at iTexico.


Post Your Comment Here