
Mobile Development: Keep your Mobile App's User Interface (UI) Simple
As a mobile app developer, when you are building mobile apps it's fairly common to make a UI Component entirely from scratch and spend quite a lot of time refining it and making it better. Maybe you've done this many times. Haven't you wondered if what you were doing was the most optimal? Wouldn't there be a better way? Usually there is a better way.
In this article I'm going to talk about two UI components that can improve your mobile app both in looks and performance.
Text in style!
It's quite common that you need to show multiple text styles in your mobile app. Suppose that you have an applicaiton that receives text in the form: username sent you a friend request
Your client wants to have the following:
- Username should be bold and black
- "Sent you a" should be green
- "Friend request" should be bold and green
You may be tempted to do this:
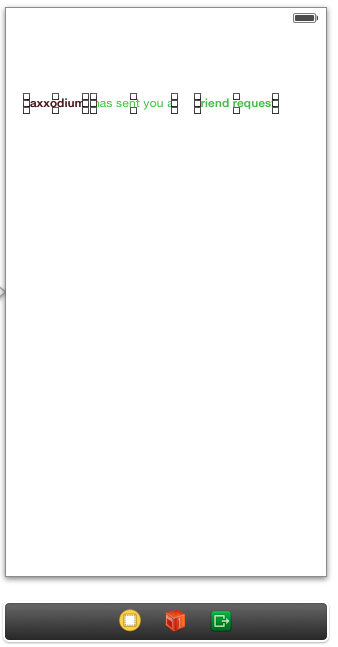
In the image above there are 3 labels, one for each segment. Each label has a text style applied to it using the provided properties from the UILabel class.
Please avoid using this method. It may look well in this example, but what if the username changes in size. Will you programmatically re-adjust the label's width and position?
Even if you did somehow manage to do that it is still prone to bugs and is generally a bad idea.
Why do it with 3 labels if you can do it with only 1, and without having to use lower level API's like CoreText?
How? Instead of using the text property of the UILabel class, use the attributedText property. Attributed strings (of the class NSAttributedString) are a special type of strings that allow you to set one or multiple styles to your text. Not only that, you can add text styles to just a section of the entire text.
Here's the basic setup:
The bottom label is just a standard UILabel dragged from Interface Builder.
Now to add content and style to this label you would do something like this:
|
// 1 NSString *username = @"taxxodium"; NSString *verb = @"has sent you"; NSString *action = @"a friend request"; // 2 NSString *text = [NSString stringWithFormat:@"%@ %@ %@", username, verb, action]; // 3 NSMutableAttributedString *attrString = [[NSMutableAttributedString alloc] initWithString:text]; // 4 [attrString addAttributes:@{NSFontAttributeName: [UIFont boldSystemFontOfSize:12.0]} range:[text rangeOfString:username]]; [attrString addAttributes:@{NSFontAttributeName: [UIFont systemFontOfSize:12.0], NSForegroundColorAttributeName: [UIColor greenColor]} range:[text rangeOfString:verb]]; [attrString addAttributes:@{NSFontAttributeName: [UIFont boldSystemFontOfSize:12.0], NSForegroundColorAttributeName: [UIColor greenColor]} range:[text rangeOfString:action]]; mLabel.attributedText = attrString; |
First we split the phrase into 3 segments so that we can reference them later, and generate a string out of those segments.
Then we make an attributed string out of the string we generated previously.
The fourth step is where the magic happens. We add 3 attributes to the string depending on the range of each segment. That's why we needed to store the segments somewhere.
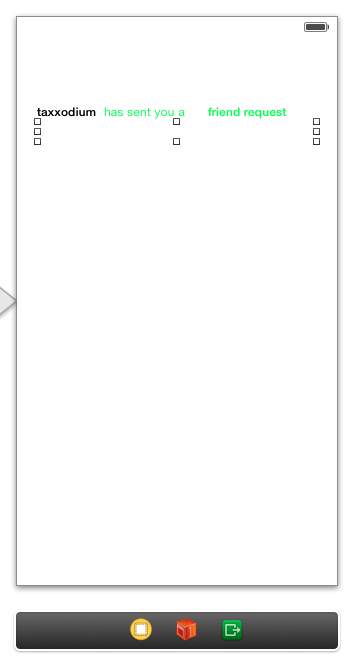
And this is the result:
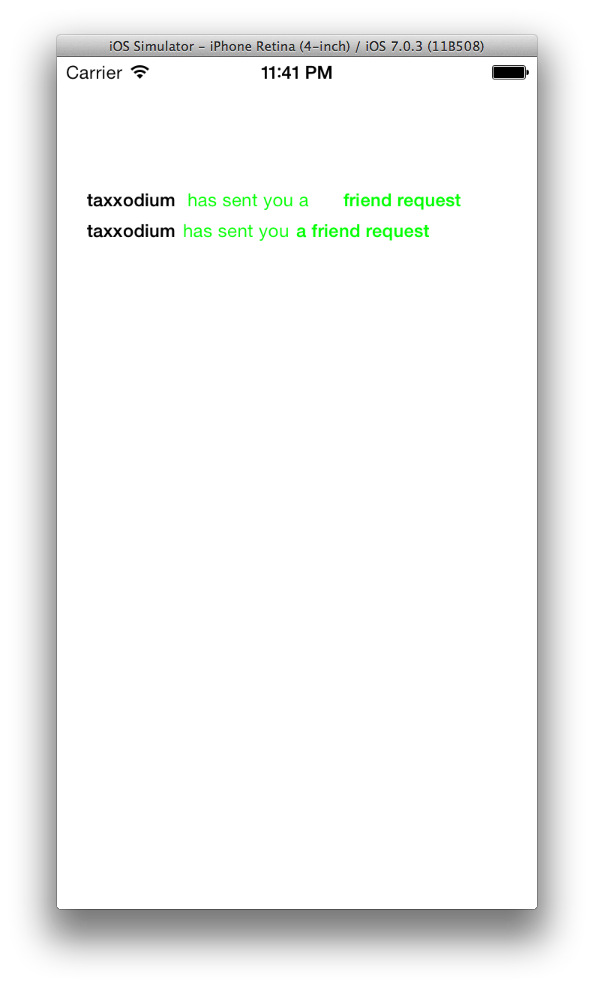
The sentence at the top of the image is the solution with 3 different labels. I added more inner spacing so it would be more visible that I was using different labels.
Below that is the solution with only 1 label but using attributed strings.
As you can see the solution at the bottom is much better and allows the text to be more flexible. You can easily adapt the code above to support more styles and more segments.
Please note that attributed strings are only supported in iOS 6 and above.
Easy grid
When you have to represent data in iOS you have a couple of options. The most notable is the UITableView, which allows you to represent your data in a list.
But what if you want to represent that data in a different way, like a grid. There are various tutorials on the web on how you can transform a UITableView into a grid, which seems to be the most optimal way since the table view reuses its cells. Or you can create your own using subviews and putting them in a UIScrollView.
As with the attributed strings, there is also a better way to do a grid view. Let me present you with the UICollectionView class.
If you read the documentation closely you'll notice that this class can not only be used for grid views but for any kind of layouts. In this example we'll use a grid view using the available flow layout.
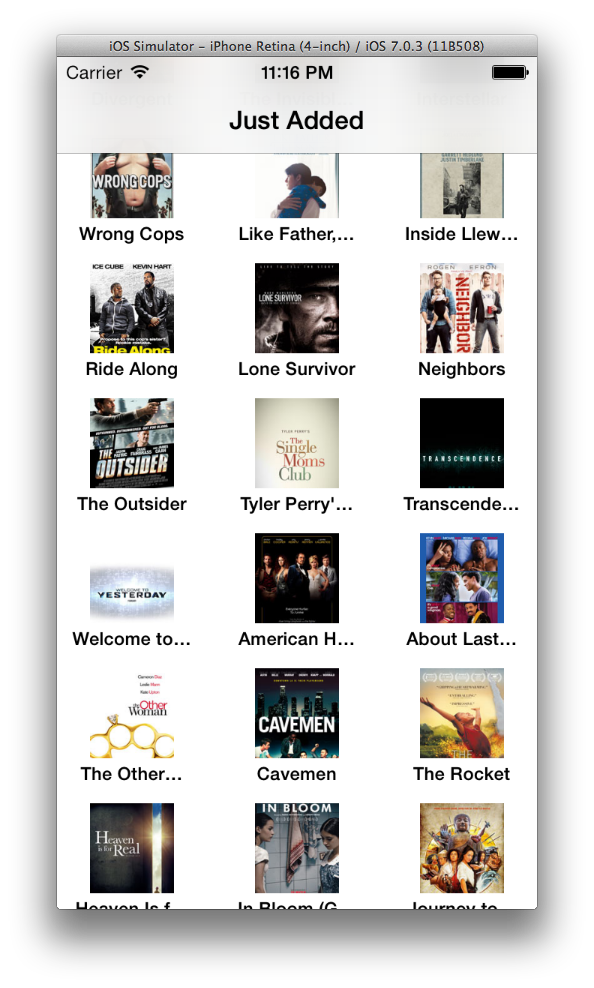
Before you begin playing with the UICollectionView, you first need to know how to organize your data and how does you data get represented on the grid. In this example we are going to build a simple app that reads from the Apple trailers page and shows a grid view with the posters of trailers and the title.
Here's how I organized the project:
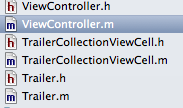
As you can see there are 3 main classes for this example:
- ViewController: contains the actual UICollectionView which is part of the storyboard and is connected through a IBOutlet. It implements the delegate and datasource methods of the UICollectionView class
- TrailerCollectionViewCell: this is the actual cell of the grid. It contains a UIImageView to show the poster image and a UILabel to show the title. It also has a reference to the Trailer class which when set, causes the cell to refresh itself to use the new content.
- Trailer: this is the model and just stores the poster URL and the title of the trailer.
It is not the most effective of setups but good enough for this example.
Let's take a closer look at the TrailerCollectionViewCell class:
|
- (void)layoutSubviews { [super layoutSubviews]; if (mPosterView == nil) { mPosterView = [[UIImageView alloc] initWithFrame:CGRectMake(0, 0, CGRectGetWidth(self.frame), CGRectGetHeight(self.frame))]; mPosterView.contentMode = UIViewContentModeScaleAspectFit; [self addSubview:mPosterView]; } if (self.trailer.poster) { mPosterView.image = self.trailer.poster; } if (mTitleLabel == nil) { mTitleLabel = [[UILabel alloc] initWithFrame:CGRectMake(0, CGRectGetHeight(self.frame)-20.0, CGRectGetWidth(self.frame), 20.0)]; mTitleLabel.backgroundColor = [UIColor whiteColor]; mTitleLabel.textColor = [UIColor blackColor]; mTitleLabel.font = [UIFont boldSystemFontOfSize:12.0]; mTitleLabel.textAlignment = NSTextAlignmentCenter; [self addSubview:mTitleLabel]; } if (self.trailer) { mTitleLabel.text = self.trailer.title; } } - (void)setTrailer:(Trailer *)trailer { _trailer = trailer; if (self.trailer.poster == nil) { [NSURLConnection sendAsynchronousRequest:[NSURLRequest requestWithURL:self.trailer.posterURL] queue:[NSOperationQueue mainQueue] completionHandler:^(NSURLResponse *response, NSData *data, NSError *connectionError) { UIImage *image = [[UIImage alloc] initWithData:data]; self.trailer.poster = image; image = nil;
dispatch_async(dispatch_get_main_queue(), ^{ [self setNeedsLayout]; }); }]; } else { [self setNeedsLayout]; } } |
The layoutSubviews method simply adds the image view and label to the cell, if they were not added already, and shows the poster and trailer title if the trailer property is set.
Speaking of which, the setTrailer method is where we retrieve the poster image of the Trailer model. If it already exists then we just redraw the layout.
Now on to showing the actual trailers. This happens in the ViewController class which is where cell and model are joined together and are shown as a grid view using the collection view.
First we do some small setup in the viewDidLoad method
|
mCollectionView.delegate = self; mCollectionView.dataSource = self; mCollectionView.backgroundColor = [UIColor whiteColor];
[mCollectionView registerClass:[TrailerCollectionViewCell class] forCellWithReuseIdentifier:@"TrailerCell"]; |
The first lines are just to set the delegate and dataSource of the collection view. There are 2 things to note here:
- the ViewController class responds to the UICollectionViewDelegateFlowLayout protocol, UICollectionViewDelegate is used for custom layouts but that's for another blog post
- we set the background color of the collection view to white, it's black by default
The last line is important. If you've used UITableView before you are probably familiar with the concept of dequeueing or reusing a cell.
Here we set up the collection view so that each time we dequeue a cell using the TrailerCell identifier, the collection view will automatically instatiate a TrailerCollectionViewCell object for us if required or use an existing one. Very handy stuff!
After this setup we just load the data from the trailers page and store an array of Trailer objects, like this:
|
- (void)loadTrailers { NSString *URL = @"http://trailers.apple.com"; [NSURLConnection sendAsynchronousRequest:[NSURLRequest requestWithURL:[NSURL URLWithString:[URL stringByAppendingPathComponent:@"/trailers/home/feeds/just_added.json"]]] queue:[NSOperationQueue currentQueue] completionHandler:^(NSURLResponse *response, NSData *data, NSError *connectionError) { int statusCode = [(NSHTTPURLResponse*)response statusCode]; if (statusCode >= 200 && statusCode < 300) { NSError *err = nil; NSArray *json = (NSArray*)[NSJSONSerialization JSONObjectWithData:data options:NSJSONReadingAllowFragments error:&err];
if (json) { if (mTrailers == nil) { mTrailers = [[NSMutableArray alloc] init]; } else { [mTrailers removeAllObjects]; }
for (NSDictionary *trailerInfo in json) { NSString *title = trailerInfo[@"title"]; NSString *posterURLString = [URL stringByAppendingPathComponent:trailerInfo[@"poster"]];
Trailer *trailer = [Trailer trailerWithDictionary:@{@"title": title, @"posterURL": posterURLString}]; [mTrailers addObject:trailer]; }
[mCollectionView reloadData]; }
} else { NSString *errorString = @"";
if (connectionError) { errorString = [NSString stringWithFormat:@"The following error occured:n%@", [connectionError localizedDescription]]; } else { errorString = [NSString stringWithFormat:@"Could not get trailers data. Statuscode: %d", statusCode]; }
UIAlertView *alertView = [[UIAlertView alloc] initWithTitle:@"" message:errorString delegate:nil cancelButtonTitle:@"Cancel" otherButtonTitles:nil]; [alertView show]; alertView = nil; } }]; } |
Then it's just a matter of implementing the delegate and datasource methods:
|
// 1 - (NSInteger)collectionView:(UICollectionView *)collectionView numberOfItemsInSection:(NSInteger)section { return (mTrailers == nil) ? 0 : [mTrailers count]; } // 2 - (NSInteger)numberOfSectionsInCollectionView:(UICollectionView *)collectionView { return 1; } // 3 - (UICollectionViewCell *)collectionView:(UICollectionView *)collectionView cellForItemAtIndexPath:(NSIndexPath *)indexPath { TrailerCollectionViewCell *cell = [collectionView dequeueReusableCellWithReuseIdentifier:@"TrailerCell" forIndexPath:indexPath]; cell.trailer = mTrailers[indexPath.row]; return cell; } // 4 - (CGSize)collectionView:(UICollectionView *)collectionView layout:(UICollectionViewLayout *)collectionViewLayout sizeForItemAtIndexPath:(NSIndexPath *)indexPath { CGFloat w = CGRectGetWidth(mCollectionView.frame)/4.0; return CGSizeMake(w, w); } // 5 - (UIEdgeInsets)collectionView:(UICollectionView *)collectionView layout:(UICollectionViewLayout *)collectionViewLayout insetForSectionAtIndex:(NSInteger)section { return UIEdgeInsetsMake(20.0, 10.0, 20.0, 10.0); } |
Let me explain what is happening here:
1. Returns the amount of items that are currently available. The mTrailers variable is created lazy so that's why we do an extra check to see if it exists. If not we just return 0 (ie no items)
2. Similar to a UITableView a UICollectionView can have multiple sections (among other things). We want to keep this demo simple so we just have 1 section. Note that you must have at least 1 section!
3. This method returns the actual cell. We dequeue a cell (the collection view will instantiate it if needed) and set the trailer property so that something can be shown
4. Returns the size of each item, here we just take the width of the collection view and divide it by 4 so we get 3 columns
5. This is optional, it just sets the spacing between the items and the collection view
Notice how almost each delegate method has the NSIndexPath class as an argument. You may recall that in iOS this class has 2 properties: row and section. Row you ask?
Keep in mind that a UICollectionView treats each item as a row. So in this example 3 rows fit in one line (hence the 3 columns), don't think of it as 1 row has 3 items.
All this code gives us the following result:
Now this is a very simple application. In an actual app you may want to make the cells interactive by allowing taps. This is very simple to achieve.
You just need to implement the following method:
|
- (void)collectionView:(UICollectionView *)collectionView didSelectItemAtIndexPath:(NSIndexPath *)indexPath { Trailer *trailer = mTrailers[indexPath.row]; UIAlertView *alertView = [[UIAlertView alloc] initWithTitle:trailer.title message:@"You tapped on this trailer!" delegate:nil cancelButtonTitle:@"Groovy!" otherButtonTitles:nil]; [alertView show]; alertView = nil; } |
Which results in this:
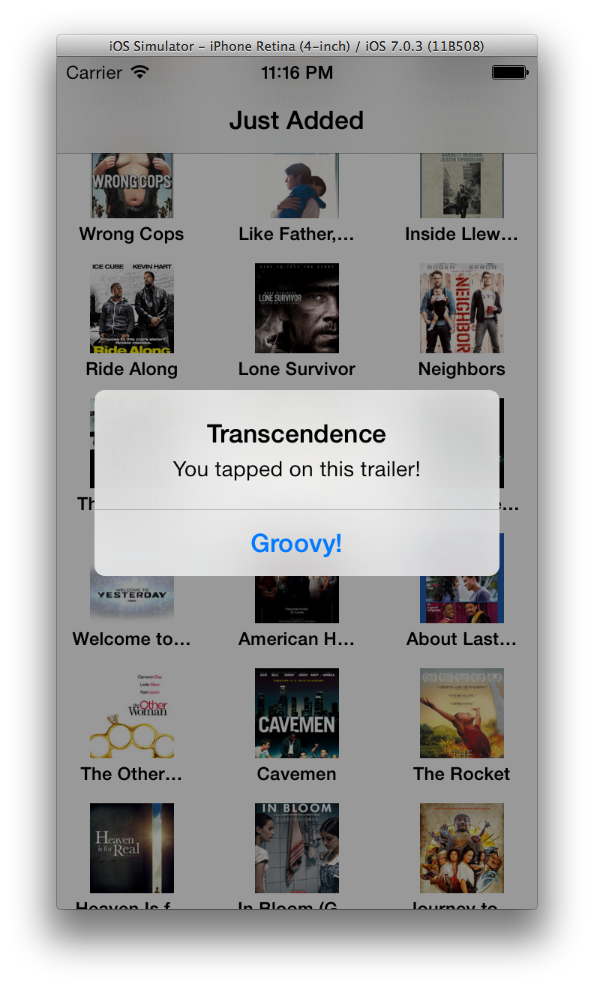
Obviously showing an alert when someone taps a cell is not great User Experience. In a real app a tap should trigger a new screen where more info of the trailer is displayed.
Again, the technique described in this example may not be the most optimal but it should give you a general idea of how a UICollectionView works and how you could organize your model or models to show data in your mobile app.
Play around with it and have fun! Also don't forget to read the documentation of UICollectionView as it contains lots of more information than what was described here.
Happy coding!
About the Author
Jesus De Meyer has a Bachelor's degree in Multimedia and Communication Technology from the PIH University in Kortrijk, Belgium. He has 15 years of experience developing software applications for Mac and more than 5 years in iOS mobile app development. In his spare time he works on his own mobile apps.


Post Your Comment Here