
iPhone Apps an XCode Tutorial: Create Tableviews Using Scrollviews

TableViews are a great tool for mobile apps and is requested very often for all types of iPhone apps.
However, the first time that I created a TableView using ScrollViews caused me some headaches and it get worse if you get lost along the process. If you want (or need) to create a scrollview within an iphone mobile app, here is a pragmatic tutorial to help you out to survive this process.
Getting started
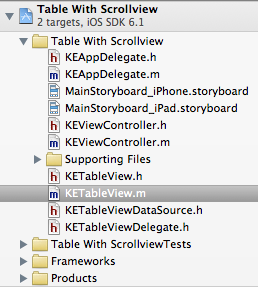
1. First of all we are going to create the files, do not worry if some errors or warnings appear, at the end everything will fit.
- Open Xcode and select the "Create new Project option".
- Select single view application.
- Name the application "TableView with ScrollView" put the class prefix KE, activate ARC and Storyboards and target to universal.
2. We need 2 protocols and 1 class. To create a New Protocol press cmd + N select the Cocoa Touch category from the left menu and click on the Objective-C Protocol from the right.
Name it "KETableViewDataSource" and save it.
Repeat the previous step but name the protocol "KETableViewDelegate".
3. At last we are going to create the table, for this, press again cmd + N but this time select Objective-C class, name the file "KETableView" make it subclass of UIView and save it.
At this point you should have something like this.
Adding the Code
Now it is time to add some code and have some fun. Let's start with the protocols:
Like in the native tableViews, the DataSource is the one in charge of provide the data to fill the table and the delegate to manage the interactions.
Add the next methods to KETableViewDataSource.
-(NSInteger)numberOfRows; -(UIView *)cellForRow:(NSInteger)row; <em style="font-size: 13px;">numberOfRows</em><span style="font-size: 13px;">: Returns the number of rows that the tableview will have.</span> |
cellForRow: Returns a row show in the tableView.
Now do the same in KETableViewDelegate.
@optional -(void) didSelectRowAtIndex:(NSInteger)index; -(void) willDisplayCell:(UITableViewCell*)cell; -(CGFloat) heightForRow; |
The @optional line prevents Xcode to show the incomplete implementation warning.
didSelectRowAtIndex: Will give you the index of tableViewRow in order to you do what you need with it.
willDisplayCell: Is called every time a cell will be added to the table (new or recycled), the idea is to give you the possibility of modify the cell before is displayed.
heightForRow: Is Called every time you refresh the view, the default height is 50.0.
Now that we have our protocols established and good to go, it is time to begin the construction of our tableView.
Go to KETableView.h and add the following methods and properties
@property (nonatomic, strong, readonly) UIScrollView* scrollView; @property (nonatomic, weak) id<KETableViewDataSource> dataSource; @property (nonatomic, weak) id<KETableViewDelegate> delegate; -(id)dequeCell; -(void)registerClassForCells:(Class)cellClass; -(void) reloadData; |
The scrollView property will be our actual table.
The dataSource and delegate will be the instances of our protocols and we'll use the weak pointer to make the things easier to the ARC compiler.
The method dequeCell does the same function that the dequeCell:withReusableIdentifier: method.
The registerClassForCells ask for the class of the tableViewRow we will use to populate the table.
The reloadData method does the same function than the reloadData method from UITableView.
Here comes the interesting part, the implementation. Because this part is a lot more complex than the previous part we will add the methods one-to-one.
Replace the @implementation KETableView with this one
@implementation KETableView{
NSMutableSet * _reusableCell; //Here we store the cells off-view. Class _cellClass; //This will store the TableViewCell class to instaciate in the dequeCell method. } |
Add the dequeCell method with the next code.
#pragma mark public methods -(id)dequeCell{
UIView * cell = [_reusableCell anyObject]; if (cell){
[_reusableCell removeObject:cell]; } if (!cell){
cell = [[_cellClass alloc] init]; [cell addGestureRecognizer:[[UITapGestureRecognizer alloc] initWithTarget:self action:@selector(didSelectRowAtIndex:)]]; } return cell; } |
We use a UITableVIewCell* as a temporary variable because we need to have a variable capable of contain the native row or your own custom rows.
We ask to the recycling poll for a cell, because all the cells are the same, any cell will be ok. Next we check if the cell is instantiated or is nil, this can happen because the recycling pool can be empty.
If is instantiated we remove the cell from the recycling pool, if not, we create a new instance of TableViewRow.
Next we add the registerClassForCells: method, I will explain it's function later.
-(void)registerClassForCells:(Class)cellClass{
_cellClass = cellClass; } |
We only store in our global yet private variable _cellClass because we use it in the dequeCell method to create instances of our rows.
The last method is reloadData.
-(void) reloadData{
[_reusableCell removeAllObjects]; // We drain the recycling pool of cells [self refreshView]; //Redraw the table } |
With reload data we dump all the stored data relative to the tableView and redraws the table.
Now let's add the constructor.
#pragma mark constructor -(id)initWithCoder:(NSCoder *)aDecoder{
if(self = [super initWithCoder:aDecoder]){
_scrollView = [[UIScrollView alloc] initWithFrame:CGRectNull]; //Initiate the scrollView. _scrollView.delegate = self; //Set its delegate. [self addSubview:self.scrollView]; // Add it to the super view. self.scrollView.backgroundColor = [UIColor clearColor]; //Set its backgroundColor transparent self.backgroundColor = [UIColor clearColor]; //Set the main view backgroundColor transparent _reusableCell = [NSMutableSet set]; //Instantiate the recycling pool. } return self; } |
initWithCoder: is called when the instance is created via .xib or storyboard.
Here you just instantiate the primary variables like the scrollView and add it to the main view.
Here is very important that YOU give your maximum attention if you want to succeed otherwise you will never get the secrets of the tableView with scrollViews.
The first method is layoutSubviews, is a UIView method, called every time you add or remove something from the main view, probably you have use it before.
-(void)layoutSubviews{
[super layoutSubviews]; _scrollView.frame = self.frame; [self refreshView]; } |
Here you are just telling to the scrollView to have the size of the mainView and redraw the table to adapt it to the new resolution, no big deal.
Now we overwrite setter od the dataSourceProerty
-(void)setDataSource:(id<KETableViewDataSource>)dataSource{
_dataSource = dataSource; [_reusableCell removeAllObjects]; [self refreshView]; } |
We do this because every time you set a dataSource the recycling pool need to be drained and the table needs to be redrawn, if you do not do this, some bad things can happen like mixing to different types of cells or simply the app crashes.
We do the same with the setter of the delegate property.
-(void)setDelegate:(id<KETableViewDelegate>)delegate{
_delegate = delegate; [_reusableCell removeAllObjects]; [self refreshView]; } |
Now, you surely had noticed the constant call to the [self refreshView] method, and you may wonder how this method works, well my friend, the time has come and now you will implement this method, which is the main method of our implementation.
Please add the next code as follows.
-(void) refreshView{
//1 if (CGRectIsNull(_scrollView.frame)) {
return; } //2 CGFloat rowHeight = (_delegate && [_delegate respondsToSelector:@selector(heightForRow)])?[_delegate heightForRow] : 50.0f; _scrollView.contentSize = CGSizeMake(_scrollView.bounds.size.width, rowHeight * [_dataSource numberOfRows]); //3 for (__weak UIView * cell in [self cellSubViews]) {
(cell.frame.origin.y + cell.frame.size.height < _scrollView.contentOffset.y)?[self recycleCell:cell]:nil; (cell.frame.origin.y > _scrollView.contentOffset.y + _scrollView.frame.size.height)?[self recycleCell:cell]:nil; } //4 int firstVisibleIndex = MAX(0, floor(_scrollView.contentOffset.y/rowHeight)); int lastVisibleIndex = MIN([_dataSource numberOfRows], firstVisibleIndex + 1 + ceil(_scrollView.frame.size.height/rowHeight)); NSArray * cellSubViews=[self cellSubViews]; //5 for (int row=firstVisibleIndex; row <lastVisibleIndex; row++) {
UITableViewCell * cell = (UITableViewCell*)cellForRow(row, rowHeight, cellSubViews); if (!cell) {
cell = (UITableViewCell*)[_dataSource cellForRow:row]; } cell.frame = CGRectMake(0, row * rowHeight, _scrollView.frame.size.width, rowHeight); //We set the position of the row on the table. cell.tag = row; (_delegate && [_delegate respondsToSelector:@selector(willDisplayCell:)])?[_delegate willDisplayCell:cell]:nil; //Delegate exist and implements the optional method of willDisplayCell, the method is called. [_scrollView insertSubview:cell atIndex:0]; //Add the row. } } |
In the part //1 we check if the scrollView(Our table) have a valid size, because if don't have it, it don't make any sense do the next. We use CGRectIsNull, a function part of CGGeometry Reference, to easily validate the scrollView frame.
In the part //2 we set the height for our rows, for this we use a ternary operator. Why? Because we wanna and is cool to use the good old fashioned C syntax. Some people says it uses fewer instructions.
Since the use of delegate is optional in our implementation, we check first if the delegate is not nil and in the case it's not, we verify if responds to the heightFroRow methods, primarily because the user is not forced to implement all the methods of the delegate. I the case this condition is not accomplished we give the default height value of 50.0f pixels.
Next, we ask for the mandatory dataSource method numberOfRows and we multiply it's value for the rowHeight to obtain the table totalHeight, and get the table width to set the proper contentSize of the scrollView.
In the part //3 all the rows that are not showed in the scrollView are removed from view and stored in the recycling pool for future use. The algorithm checks if some portion of the upper rows or if the top of the bottom row are showed. For the com probation we use cool ternary operators and call the recycleCell: method.
In the part //4 we calculate from what index we will begin drawing the cell and where do we stop drawing. For the first visible item we use the cool MAX(a,b) macro function which returns the bigger value of to elements, in this case will be a comparison between the 0 index and the index result of calculate the y coordinate of the displayed screen divided by the row height.
The last index is the smaller value between the number of rows or the result of adding the first visible index plus the numbers of rows visible on screen plus 1.
In the part //5 we start a cycle from the first visible index and the last visible index.
First we declare a local instance of UITabelViewCell and call the function cellForRow, if the return value is nil we ask to the dataSource for the row at the specified index.
Knowing the index and the rowHeight is easy to calculate the "Y" coordinate by multiplying these 2 values. Next, a tag is added to the row, in order to be identified if is tapped.
Like in the heightForRow method, the implementation of willDisplayCell: is optional. We need to verify if is possible to execute the method before it can be executed.
Finally we insert the row in the right position.
As you can see there are a lot of methods which currently doesn't exist but you are about to fix that.
Now is time to add the cellSubViews method.
-(NSArray*)cellSubViews{
NSMutableArray * cells = [NSMutableArray array]; for (__weak UIView * view in _scrollView.subviews) [view isKindOfClass:_cellClass]?[cells addObject:view]:nil; return cells; } |
The for cycle runs over all the subviews of the scrollView and evaluates if the subview is from the previously defined row class and if it is, the view is added to the array, when the cycle finishes the array is returned.
Now add the recycleCell: method.
-(void)recycleCell:(UIView*)view{
[_reusableCell addObject:view]; [view removeFromSuperview]; } |
This method simply adds the cell to the recycling pool and removes them from the table. This is what happens in the part //3 of refreshView.
Now, we are going to add something a little bit different. We are going to add a function.
This is the code for the cellForRow function:
UIView * cellForRow(int index, CGFloat rowHeight, NSArray * subviews){
float topEdgeRow = index * rowHeight; for ( __weak UIView * view in subviews) {
if (view.frame.origin.y == topEdgeRow) return view; } return nil; } |
This function is called at the beginning of part //5, the For Cycle searches for a row in the subviews which "Y" coordinates corresponds to the coordinate of the row which is about to be displayed, if the row is found, it's returned and the table doesn't need to re-draw it.
You are about to finish your table view, there is only 2 remaining methods the first is the action called in the Row Gesture Recognizer.
#pragma mark KETableViewDelegate -(void)didSelectRowAtIndex:(id)sender{
UITapGestureRecognizer * recognizer = sender; (_delegate && [_delegate respondsToSelector:@selector(didSelectRowAtIndex:)])?[self.delegate didSelectRowAtIndex:recognizer.view.tag]:nil; } |
The last method is a method from the UIScrollViewDelegate
#pragma mark UIScrollViewDelegate -(void)scrollViewDidScroll:(UIScrollView *)scrollView{
[self refreshView]; } |
When the scrollView is scrolled, calls the refreshView.
Now you have your tableView using scrollView so that means here comes the quick part, yes, the implementation.
Go to your view controller view in the storyboard and drag a UIView to the view controller, this will be your table.
Open the inspector view and in the custom class field make the view you just dragged a KETableView.

Now create an IBOutlet on the .h of the view controller and import KETableView.h.
You are almost there.
Go to the .m of the view controller and import and implement the 2 tabelView protocols.

Replace the viewDidLoad method with this one
- (void)viewDidLoad {
[super viewDidLoad]; [self.table registerClassForCells:[UITableViewCell class]]; self.table.dataSource = self; self.table.delegate = self; self.table.backgroundColor = [UIColor blackColor]; } |
Implement the KETableViewDataSource methods
#pragma mark KETableViewDataSource -(UIView *)cellForRow:(NSInteger)row{
|
Almost there the only thing left is implement the KETableViewDelegate
#pragma mark KETableViewDelegate -(void)willDisplayCell:(UITableViewCell *)cell{
-(CGFloat)heightForRow{
|
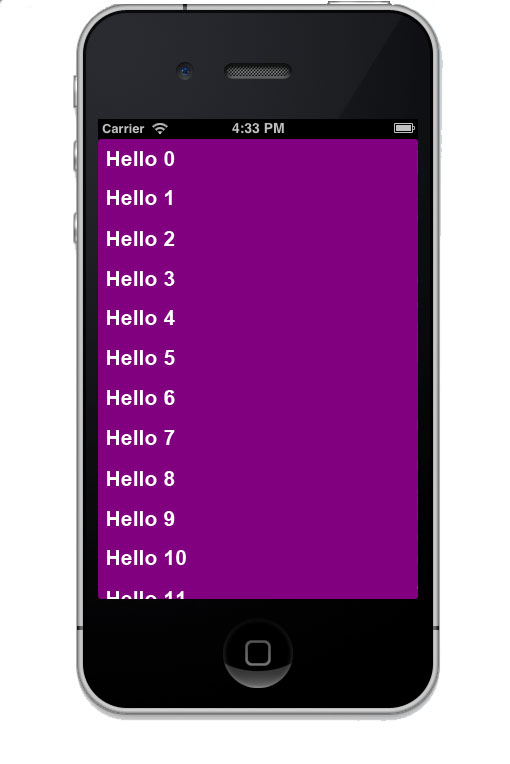
And here comes the reward. Press run and see the magic realized.
Get the Code
I hope this information helped in one way or another. You can download the sample project from github, feel free to modify it and contribute.
About the Author
Eduardo Carrillo is a Software Engineer with more than 3 years of experience in mobile development. He has worked with several mobile projects and startups along his carreer being the most recent LastRoom, a mobile app for last-minute hotel reservations.


Post Your Comment Here