
iOS Mobile Development: Using Xcode Targets to Reuse the Code

In the context of iOS mobile app development, a clone is simply an app that is based off another mobile app. A clone usually has more or less the same code base with probably a slightly different functionality. It’s quite common for this app to have new images, even though most of the UI is the same as the original app.
There are different ways to handle the development of clones. Probably the most common or the one that will first come to mind is using branches.
However, I’m going to talk about a different approach in the form of targets.
1. Targets versus branching
Using branches is not a bad approach by all means. However, there are some serious drawbacks when using them.
Firstly, you may need to go back to your first app to solve bugs the users may have found. Once you’ve fixed those bugs, you will want to merge those fixes in your new branch just to see that you’ll have a bunch of conflicts.
By the time you’ve successfully made the merge, you’ll notice that you’ve spend more time here than doing actual work on the new app.
Fortunately there is a better way that does not require branching. Most IDE’s have some sort of target support (in Android they are called Flavors).
Targets work more like configuration files. You use the same code for all your targets, but each target is configured differently, whether it’s a new app icon or a slight change in logic.
The setup can be tricky but it’s far more powerful than using branches. Let me show you.
2. Adding a new target
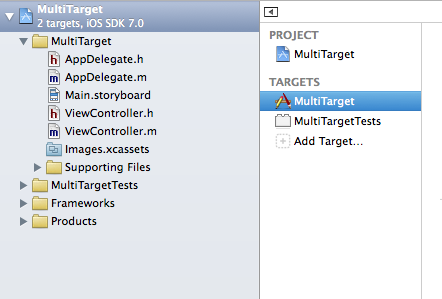
We'll be using Xcode 5 for this article and we’ll be using a project that I called MultiTarget.
The first thing you want to do is select the project item in Xcode’s project window which may look a little bit like this:
The first step is to duplicate the target like this:
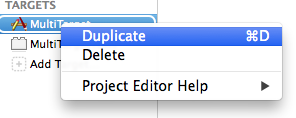
Change the name of the copy to whatever you want and keep it selected as we need to configure a few things.
Since this is a new app, you probably want a different bundle id for each target. You can do this manually by changing the value Bundle identifier in the Info section of the target, or you can be a bit more flexible by adding a new user defined setting.
This also allows you to have a different bundle id for an app built for Debug or Release.
To do this, select the Build Settings section and go to the Editor menu and select Add User-Defined Setting like this:

Give the new user setting a name like APP_BUNDLE_ID and give it a value:

And finally tell the Info.plist about this setting and in the Info section change the value of the Bundle identifier to ${APP_BUNDLE_ID}:

Of course you can add more user settings but remember that to use this setting, you need to use the following syntax: ${YOUR_USER_SETTING}
Note: if your user setting contains spaces you will need to quote it like so: ${“YOUR_USER_SETTING”}
This is useful if your user setting is a path or some string that may contain spaces.
Now if you go to the General section of the target you will see your change reflected:

The value here comes from the newly defined user setting and if you’ve defined a different bundle identifier for debug or release, the Bundle identifier here will change too. "Automagically!"
Pretty sweet :) Moving on…
3. Using asset catalogues
New in Xcode 5 are asset catalogues which are treated as special files in Xcode but are in fact, folders on your hard disk with images inside them.
Not only are asset catalogues great for organizing your image files, but they also tell you if you are missing @2x versions of your images etc…
If you used to previous versions of Xcode, you probably have a resources folder with all your images inside them. Also there are probably some other images outside this folder for your icons and launch images.
So what you need to do is make sure that you are using the asset catalogues first. This is done in the General section of the target. Above the App Icon sub section you have a button that reads: Use Assets Catalogue. Click on it and you’ll have something like this:
In your files list on the left of the project window you’ll also have a file called “Images.xcassets”. Select it and you’ll see that it opens as a kind of an image organizer:

The images you see here are from your first app. So you probably want to add the icons and launch images from the new app.
Select the + button at the bottom and select New App Icon. Repeat to make a New Launch Image.
![]()
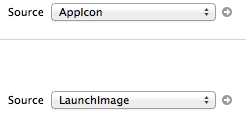
You will want to rename the App Icon and LaunchImage to match the new app name. I did it by adding a prefix to the file name:
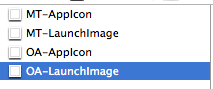
That way you can pick which icons and launch image you want to use for each target. Select them in the General section of the target, as shown here:
![]()
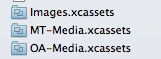
Finally, you will want to use separate asset catalogues for all the images of your app. In my example project I’m using 3 asset catalogues:
- one used by both targets for the app icon and launch image (the Images.xcassets file)
- one used by the MultiTarget target
- one used by the OtherApp target (ie the second app)
The only thing you need to do is tell each target which asset catalogue you want to use.
You do this in the Build Phases section of the target, under the Copy Bundle Resources subsection:
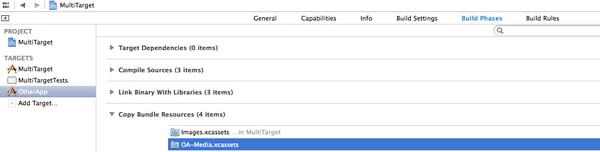
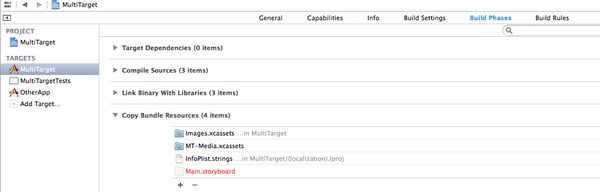
As you can see from the images above, both targets use the same Images.xcassets file (which holds the app icon and launch images). But the MultiTarget target uses the MT-Media.xcassets and the OtherApp target uses the OA-Media.xcassets.
At this point you’ve successfully separated image assets and some configuration settings while using the same code base.
However, just adding a new skin to the new app is probably not the only change you wanted to make. So let’s talk about changing the logic of the app.
4. The same but different
If we had used branches instead of targets, we would probably have to solve merge conflicts at some point. Even in a world with no conflicts at all, maintaining 2 code bases is not an easy task, even if they are similar.
When using targets we can also organize our code in such a way that it would look as if we had 2 similar code bases and still maintain one big code base at the same time.
However, purists might not consider it to be very elegant.
Enter the world of preprocessor macros. Most C-based languages and its compilers support this feature which allows you to use one part of your code depending on the condition that you supply.
For example, suppose you have this method:
|
- (void)greet { NSLog@“Welcome to MultiTarget”); } |
No matter which target you select, the method will always show the same text in the log. This is not what you want of course.
So how can we change this method to be different depending on the selected target? You guessed it, with preprocessor macros.
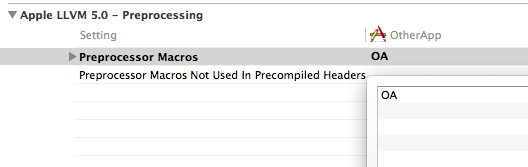
In Xcode you add preprocessor macros in the Build Settings section of the target. Double click on the right of the text “Preprocessor Macros” and a pop up will show up with a list of all your macros. Add a new macro for each target. For instance for MultiTarget, I added the macro MT and for OtherApp I added the macro OA:
Now to use these macros, you’ll need to change the code above like this:
|
- (void)greet { #ifdef MT NSLog@“Welcome to MultiTarget”); #elif OA NSLog@“Welcome to OtherApp”); #endif } |
#ifdef simply means “if defined”. In human terms it comes to asking the compiler if the MT or OA macro is available. Since each target has a different macro, one of the 2 macros will always be set (depending on the selected target you used to build the app).
It should be noted that preprocessor macros don’t need to be words alone, they can be something like: DEBUG=1
However, they are used a little differently. In this format you usually are more interested in the value of the macro rather than knowing if the macro is available at all.
So instead of using #ifdef you simply use #if like this:
|
#if DEBUG == 1 // do something for DEBUG mode #endif |
Please refer to the documentation of the C language for more information on how to use these statements.
5. No more conflicts…
As you can see, the target solution is not that hard to implement and is definitely less messy than if you’d use branches. The process of merging branches specially can be quite hard and could even lead to data loss.
By just separating your assets and adding some statements to select code depending on the target you are able to maintain multiple apps at the same time, so to speak.
And if you use user defined settings and preprocessor macros, you’ll find that this approach is far more flexible than branches.
I hope you can find good use of this tutorial and if you have any questions post them below.
Until next time!
About the Author
Jesus De Meyer has a Bachelor's degree in Multimedia and Communication Technology from the PIH University in Kortrijk, Belgium. He has 15 years of experience developing software applications for Mac and more than 5 years in iOS mobile app development. In his spare time he works on his own mobile apps.


Post Your Comment Here